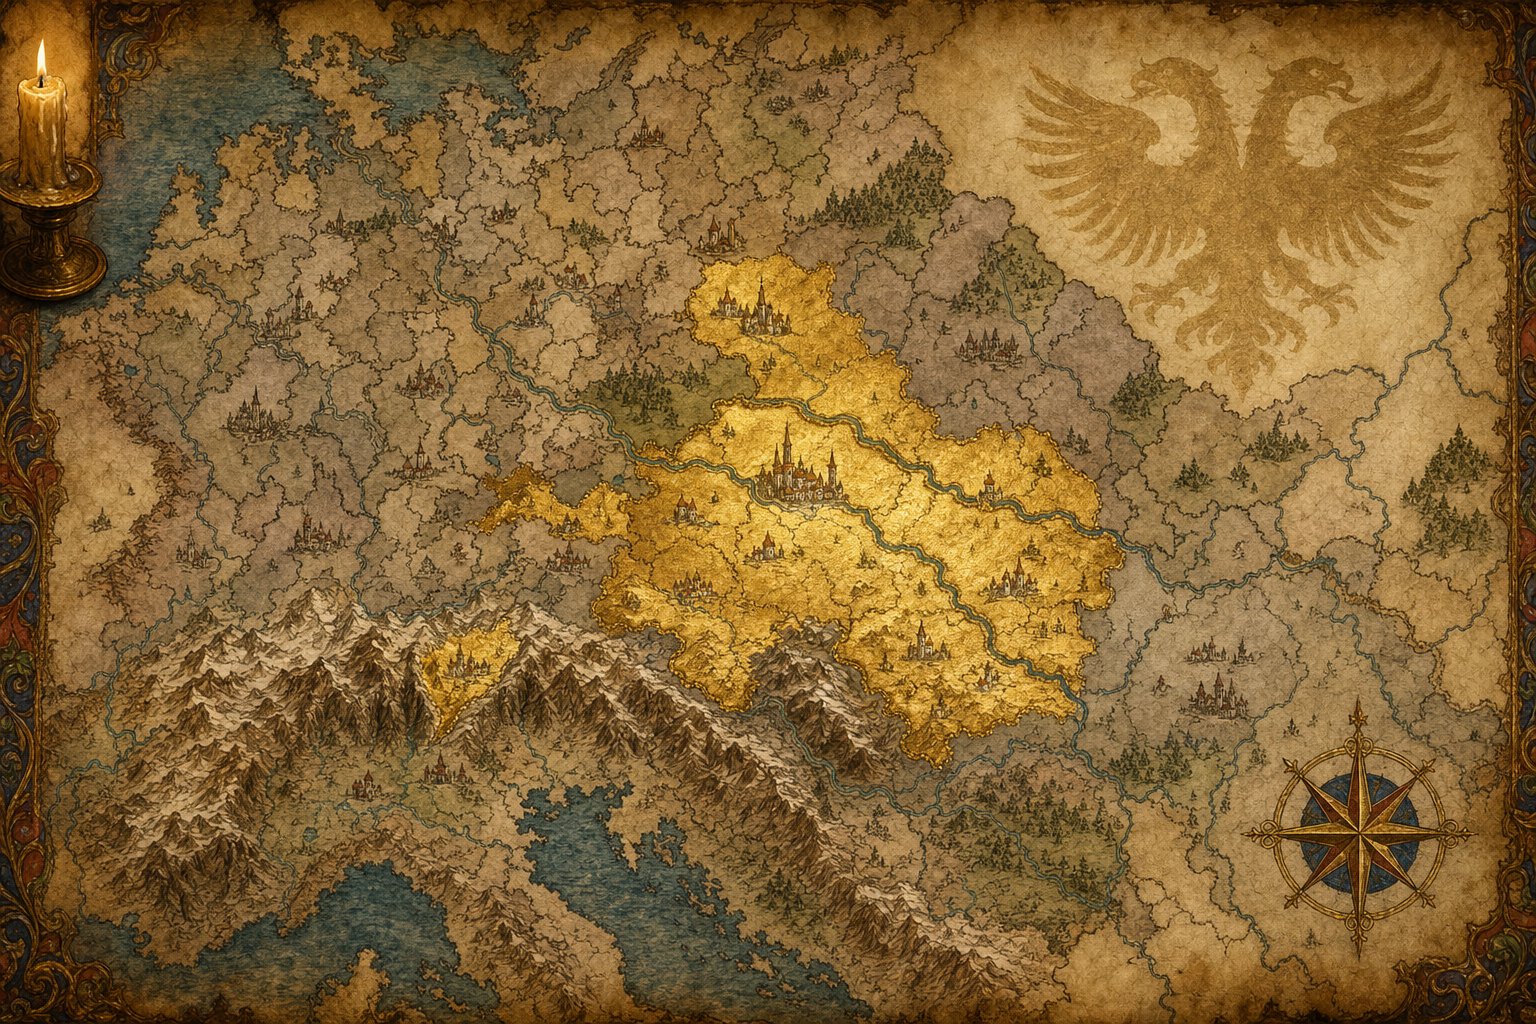
Austria is the best nation in EU5, and it is not particularly close. That is not patriotism — it is arithmetic. Most countries expand and get punished for it: antagonism climbs, coalitions form, and every war you win makes the next one harder. Austria expands and gets away with it, because its diplomatic reputation converts into antagonism reduction at a rate that breaks the normal cost of conquest. Once you understand that single conversion, the entire Austrian campaign stops looking like a list of tips and starts looking like one machine with three parts that feed each other.
This guide gives you that machine. Not a build order to copy blindly — you will hit a different Hungary, a different election, a different Black Death than anyone else — but the mental model that tells you why each move matters, so you can improvise when your campaign inevitably diverges. The order below is the order the engines come online: reputation first, because it unlocks cheap expansion; crown power and the mine economy next, because they pay for it; the Empire last, because it multiplies everything you have already built.
Why Austria Feels Broken: The Reputation Engine
Start here, because this is the idea the whole campaign is built on. In EU5, taking land generates antagonism — the successor to aggressive expansion — which sours relations and pulls neighbors into coalitions against you. Diplomatic reputation reduces the antagonism you receive. For most countries that reduction is a small cushion. For Austria it is the entire strategy, because Austria stacks diplomatic reputation higher than anyone else can.
The conversion rate is the thing to internalize. Hover your diplomatic reputation in the diplomacy panel and the tooltip shows you exactly how much antagonism it is currently canceling — the rate works out to roughly five percent less antagonism received per point of reputation. Read that number yourself rather than memorizing it, because it is the one figure that makes every other Austrian decision make sense. When a single event, tradition, or cabinet action can add one or two points of diplomatic reputation, it is not a minor bonus. It is five to ten percent off the cost of every war you will ever fight, compounding across a century.
This is why Austria obsesses over sources of diplomatic reputation that other nations ignore. The conciliatory societal-value track is the primary early engine: pushed toward its maximum it can grant several points of reputation, which alone can cut the antagonism you receive by around a fifth. A diplomatic-reputation tradition shaves antagonism further. A unique Austrian tech adds more. Small sources that would be rounding errors on France become load-bearing on Austria, because they all pour into the same conversion.
The catch defines your entire opening tempo: war pushes you off the conciliatory track. Conciliatory rises in peace and is set back the moment you go to war. So the optimal Austrian opening is deliberately, almost uncomfortably peaceful. You max the conciliatory track first, stacking reputation while you build your economy and consolidate your core, and only then do you start the first war. Players who open with an early conquest feel productive for a decade and then wonder why their reputation engine never came online. The patience is not caution — it is the build order.
There is one ritual that turns this engine into free land. Before you sign any peace deal, switch your cabinet action to the diplomatic-endeavors setting. It banks a burst of diplomatic reputation right at the moment you are about to take territory, so the land you grab lands on top of your highest reputation number and generates the least antagonism. Do this every single war and it stops feeling like a trick and starts feeling like the reason Austria can eat Hungary, Bavaria, and beyond while the rest of Europe shrugs.
Expansion itself is laundered through subjects. You conquer land, release it as subjects, and annex them slowly over time — which keeps your direct antagonism low and your diplomatic capacity busy in exactly the way the emperorship rewards. The diplomacy guide covers antagonism, coalitions, and subjects in full; the rest of this page is about building the two engines that let you exploit this one.
Austria's Starting Position
The reputation engine is why Austria ends up unstoppable. The starting position is why the first twenty years feel like the opposite. Austria opens as roughly the ninety-first most powerful country in the world, with disconnected non-core territory scattered around the map, a realm that is badly decentralized, and — crucially — it does not yet hold the imperial crown. The early game is about earning the crown, not conquering the map.
Read the start the way a veteran does before you unpause, because three of Austria's features decide everything that follows:
- You do not start with your own market. Vienna sits on the Danube, which projects control beautifully up and down the river, but Austria begins plugged into someone else's market. Creating your own market in Vienna is one of your first real economic moves — and it is dangerous if done too early, which the economy section below explains.
- Your land is disconnected and over-decentralized. You hold exclaves you cannot efficiently govern. The correct response is not to cling to them: sell disconnected land or release it as tiny subjects that generate income without eating your control. Your core — Upper Austria, Lower Austria, Styria, Carinthia, Carniola, Salzburg, Tyrol, Trent — is what you consolidate.
- You own silver, and later gold. Austria's economy is built around precious metals. Silver is a meaningful share of your early GDP and grows as you develop it and capture more mines. This is not a footnote; it is the foundation of the entire economic plan.
One structural fact about EU5 shapes every Austrian ambition: personal unions are mechanically stronger than in EU4 but far less scripted. There is no guaranteed Bohemia union, no guaranteed Hungary union, no Burgundian inheritance event waiting to hand you half of France. You earn every province. Players arriving from EU4 keep waiting for the event chain that used to deliver the Habsburg blob, and it never comes. The dynasty is still your identity, but the map is something you build, not something you inherit.
Two cultures deserve early attention because they gate your expansion. Accepting Southern Bavarian is cheap — a fraction of a point of prestige, because it is close to your own culture — and pays for itself immediately in levies and control. Slovenian costs far more but is necessary if you intend to move on Cilli and the Slovenian lands. Accept cultures; do not try to assimilate provinces, which is slow and expensive when acceptance within your own culture group is this cheap. The control guide explains why accepted-culture provinces govern so much better.
The Opening Sequence
Here is the tempo for the first handful of years, with the reasoning attached to each move so you can adapt it. The principle underneath all of it: feed the reputation engine and the crown-power engine simultaneously, and do not start a war until both are running.
- Take Autocracy and diplomatic traditions in your crown privileges. Autocracy grants free crown power, and crown power is the stat the entire internal game runs on. Diplomatic traditions point straight at the reputation engine. These two are your day-one picks.
- Put a dynasty member in the cabinet and make them head of cabinet. A younger brother or heir in the cabinet grants bonus crown authority and legitimacy. The cabinet replaces the old mana-point system, so a seat is never decorative — but do not waste a seat on integrating core land early, which locks it up for years. That is a classic new-player trap.
- Push the conciliatory track and centralization through cabinet actions. Set your cabinet to the actions that raise conciliatory societal value and centralization. This is the peaceful reputation build running in the background while you do everything else.
- Accept Southern Bavarian culture, then create subjects from disconnected land. Cheap acceptance buys levies and control; releasing subjects from land you cannot govern keeps your budget positive and your overextension nonexistent.
- Favor the ruler in law, and favor the burghers over the nobility in estates. The nobility starts absurdly powerful in almost any nation because you have no towns yet — there are effectively no burghers to counterbalance them. Tilt toward the burghers deliberately. Favoring the ruler raises crown power at the cost of some estate dissatisfaction, which is exactly the trade you want early.
- Build wheat production near Vienna and raise stability spending — but do not create a market yet. A market on a nation with no food stockpile triggers a massive food-import spike that can bankrupt you within months. Build food first. The economy section covers the timing.
- Rival Hungary immediately. Hungary is the recurring early threat and a source of a free war casus belli. Rivaling it now sets up the preemptive war you will fight once your engines are online.
Notice what is missing from that list: any war. The opening is reforms, cabinet, culture, estates, and economy. If you feel the urge to declare something in year two, that is the EU4 reflex talking, and it is the single most expensive mistake an Austrian player can make. Your first war comes later, on your terms, against a Hungary you have already decided to fight.
Crown Power and Centralization
If diplomatic reputation is how Austria expands for free, crown power is how Austria functions at all. For a monarchy it is the single most important internal stat. Below roughly a quarter crown power you eat penalties across the board — trade income, tax efficiency, policy cost, cabinet efficiency, and diplomatic reputation itself all suffer. Open the crown power panel and it lists every penalty you are currently taking; the top bracket starts around that quarter mark, so getting above it is your first internal goal. Read the panel rather than trusting the exact threshold, because it is the penalties listed there that matter, not any magic number.
Crown power and centralization are the same project viewed from two angles. Centralization is a societal-value axis, and it is almost always the correct direction: the centralized bonuses — stronger trade income, better control, more crown power — dwarf the decentralized ones, which mostly amount to slightly more loyal subjects. Austria starts very decentralized, so you must actively push toward centralized through privileges, cabinet counselor actions, law changes, and event choices. Every time the game offers you a centralize-versus-decentralize choice, the answer is nearly always centralize.
The loop that drives the internal game is short and worth memorizing: max legitimacy, then max stability, then let population promote. At full legitimacy you gain a flat bonus to crown power. Stability drives how fast your population promotes from peasants into soldiers, laborers, burghers, and clerics — which is how your economy actually grows. So the early priority is to push legitimacy toward its cap (ask the clergy for it), keep stability high, and let promotion fill your developing economy. This is also why the Black Death hurts so much: it empties job slots that only high stability can refill quickly.
Two economic levers here surprise new players. The first is court cost, which sounds like a cute cosmetic modifier and is not. Court cost is a percentage of your entire tax base consumed by the court. A few points of it costs far more than it looks, and reducing it — for instance through the plutocracy end of a social-value axis — has an outsized impact on your budget. The second is the crown estate: placing a crown estate on your first army grants a flat bonus to crown power, and the royal court building grants a further flat (not local) bonus. These are cheap, permanent, and exactly the kind of small source that compounds — the same logic as the reputation engine, applied inward.
The estates and crown power guide goes deep on satisfaction thresholds, privileges, and the parliament that changes your laws. The one estate rule to carry into every Austrian game: keep every estate above roughly a quarter satisfaction, or they start plotting your demise, and never strip a noble privilege early — the stability cost scales with the estate's power, and the nobility is powerful enough that removing a privilege at high stability can drop you deep into the negative.
The Control Economy: Silver, Mines, and Proximity
Control is the meta for Austria's economy, and understanding it turns a struggling campaign into a rich one. Control radiates outward from your capital — Vienna sits at full control — and decays with effective distance. Flat terrain and rivers spread it easily; mountains strangle it; roads and bridges extend it. Every location you own is taxed, recruited from, and developed only at the rate its control allows. A silver mine producing enormous wealth on paper is worth almost nothing if its control is low, because the control-adjusted tax base is a fraction of the raw number.
This is why the entire Austrian economy is built around one instruction: build everything off the silver mine. The sequence looks like this:
- Raise control on the mine first. Build a road to it, place a bailiff on it, and put a bridge on the capital. Roads and bridges raise proximity, proximity raises control, and control is what converts the mine's raw wealth into taxable income.
- Only now create your market in Vienna. With food production built up beforehand, the market's food-import spike is survivable. Lock your food imports manually so the AI does not cancel them. A market that is too small starves your armies in war, so do not market on a tiny nation before you can feed it.
- Develop down the Danube. Vienna's river network is a control highway. Spread development along it and value propagates for free.
- Migrate workers into the mine. Moving population into the silver mine — eventually thousands of workers — is what scales its output.
- Build the processing layer in cities. Raw resource operations are more efficient in rural provinces; processing is what cities excel at. Silver and gems become jewelry through a jeweler, and jewelry is also your answer to the inflation that running heavy precious metals causes. Salzburg has gems — take it early so the jewelry industry has both inputs at home.
When you capture a gold mine — usually from Hungary or Poland in your first real wars — repeat the whole sequence on it: road, bailiff, bridge, then develop. A developed gold mine makes you, in plain terms, rich. Just remember that precious metals cause inflation, so build the jewelry industry or trade the metals away to keep it in check. The economy guide explains the full tax-base pipeline — gross income, control adjustment, estate split, then your tax rate — and the trade and markets guide covers how resources actually reach your treasury through markets.
Two building rules save a lot of wasted money. Local governors can only be placed in cities, so if you want a governor projecting control into Hungary or the Balkans later, create the city first and plan its placement around rivers and plains. And do not build past a location's building cap — exceeding it gives negative modifiers, so spread marketplaces and industry across nearby cities instead of stacking everything in Vienna. A well-developed Vienna with the right industries can out-earn sprawling conquest; playing tall is genuinely strong in EU5, and Austria is one of the few nations that gets to be both tall and an expansionist power.
First Wars: Preempt Hungary, Then Expand by Scalpel
Your first war is Hungary, and the most important thing to know is that you should start it, not wait for it. Left alone, Hungary snowballs — its armies can grow to roughly fifty thousand within a couple of years, and it will attack you on a bad casus belli on its own schedule. Attacking first, on your terms, with your reputation engine online and your economy behind you, is both safer and faster. Rivaling Hungary early gives you a Show of Superiority casus belli, which starts the war with a large chunk of war score already banked — verify the exact starting score in the war screen, but it is enough to make the conflict move quickly.
The way you fight it matters more than the numbers. EU5 combat punishes big armies: large forces carry movement penalties, and in woods, hills, and mountains the combat width is so tight that a huge army cannot bring its full weight to bear. So the winning method is defensive and patient. Mass on favorable terrain near your capital, hold your castles — defending a fort is a defensive battle, which is overwhelmingly in your favor — and let the AI break its line against you before you commit. Do not chase. Play slow and you can beat an AI that outnumbers you; chase it across the map and you lose armies to attrition and food shortages for no gain.
A two-army structure works well through the early and mid game. One army is all artillery and sits in a defensive position under a good general. The other has no artillery and roams the map killing enemy levies. Stop using levies yourself where you can — trade the relevant privilege for something more useful, because levies are a drag on a professional force.
The peace deal is where the reputation engine pays out. Before you sign, switch to the diplomatic-endeavors cabinet action to bank the reputation spike, then take only what you need. Against Hungary and Poland, the prizes are economic: separate-peace Poland for ducats, war reparations, and the provinces holding silver and gold mines. Break the Hungary-Poland alliance so they cannot combine against you later. One warning that decides these wars: Hungary's AI can build a high-integration union with Poland, and if it does, Poland cannot negotiate a separate peace at all — you must win the whole war, which is when strong allies like France become mandatory rather than nice to have.
After Hungary, expansion inside the Empire follows a different rule entirely: the scalpel, not the sword. Antagonism is higher inside the HRE, aggressive expansion is dangerous even for two provinces, and you need member states alive to pass laws. So Austrian HRE expansion is many small wars — one to three locations each — separated by long truces, while your treasury fills with other people's taxes. Salzburg, Passau, Gorizia, Ortenburg, Brixen, Aquileia, Trent, and Lower Bavaria all fall this way over decades, not in one blob. Attacking an HRE member you have good relations with costs stability, so budget for it. The warfare guide covers supply, sieges, and early-era combat in full.
The HRE Is a Law Game, Not a Conquest Game
The Holy Roman Empire is where Austria's long game lives, and the reframing that makes it click is this: the Empire is not territory you conquer, it is a set of laws you pass. Pass five policies that benefit the emperor and the Empire effectively renovates itself around you, funneling money and authority to Vienna without you having to annex a single prince.
The emperorship itself is the gateway. The imperial election fires when the sitting emperor dies, and Austria gets elected automatically if your relations with the electors are decent — improve opinion of every elector with your diplomat capacity and it essentially falls into your lap. The crown grants a third cabinet slot, extra diplomatic capacity, the ability to bestow free city status, and the prestige that feeds every future law vote. Hold onto it by keeping elector opinion high; the emperorship is not a one-time prize but a relationship you maintain.
Once you are emperor, the law chain is the actual game. Each law requires Imperial Authority, prestige, and elector votes — and Imperial Authority drops during wars, so never start a law debate mid-war. The chain that matters runs like this:
| Law track | What it does for the emperor | Why it matters |
|---|---|---|
| Favor the ruler | Raises crown power at the cost of some estate dissatisfaction. | Feeds the internal engine; the right default for a monarchy. |
| Dynastic preference | Eases your reelection as emperor. | Turns the crown into a permanent Habsburg possession. |
| Imperial Treasury | Opens a shared HRE pool that members contribute to. | First step toward extracting the Empire's wealth. |
| Direct Taxation | Princes pay the emperor directly, not a shared pool. | The money starts flowing to Vienna. |
| Imperial Taxation | Even more emperor income, for a large Imperial Authority cost. | The endgame of the treasury chain. |
| Landfriede | Restricts internal HRE wars step by step; late levels let the emperor overrule the Diet. | Pacifies the Empire and concentrates authority in you. |
The voting screen is where diplomatic reputation and opinion come back around, completing the machine. Hover a law that is mid-vote and the game shows you each prince's vote and their reasons. You can only bribe princes voting against you, and electors carry far more voting weight than ordinary princes — so bribing three electors can swing a vote that would otherwise lose badly, and some friendly electors cost almost nothing to flip because they have barely any reason to oppose you. The factors that sway votes are exactly the stats you have been building: diplomatic reputation, opinion of you, and Habsburg dynastic power, which scales with your great-power score and how much of the Empire's population you own. Every diplomat you spend improving relations with princes, every point of reputation you stack, every province you add to the Empire — it all cashes out here, in laws that pass almost automatically because you spent fifty years making everyone like you.
Two pieces of HRE advice keep you from wasting a decade. First, let the Italians leave. The Guelph-versus-Ghibelline faction fight runs in the background, Naples anchors the leaver faction and makes it too strong to hold, and their departure costs you zero Imperial Authority — fight them later in separate wars if you want their land. Second, treat dismantling the Empire as optional flavor, not the goal. It requires pushing a huge share of HRE land into non-member hands, triggers a large religious civil war, and by the time you have done the tedious work of qualifying, you may well ask whether you still care. The law game gives you the Empire's money without the headache.
Subjects and Culture: How Austria Actually Grows
Austria does not blob. It releases, integrates, and repeats — and the subject lifecycle is the mechanism that keeps your antagonism low while your realm keeps growing. The cycle runs like this:
- Release conquered land as subjects instead of integrating it directly. Puppets generate their own cores over time.
- Enforce your culture on the subject before annexing. The enforce-culture action gives a temporary desire boost that ticks down; by the time annexation begins, the subject already has the right culture, which smooths the whole process.
- Annex subjects two at a time as loyalty allows, inheriting the cores they generated for free.
- Release new subjects from fresh conquests and repeat. Never stop the cycle — if you release subjects without annexing old ones, all of them drift toward disloyalty. The annex-release rhythm is something you maintain forever, not a phase you finish.
This is also where the reputation engine and the emperorship combine: subjects cost diplomatic capacity to hold, and the emperorship hands you a large diplomatic-capacity bonus, so Austria can run a subject-heavy strategy that other nations simply cannot afford. Feed a subject enough land to make it the dominant nation of a culture group and you can even ask it to improve cultural relations, which makes culture acceptance cheaper for you.
Culture management is the quiet multiplier underneath all of it. Accepting a culture within your own group is nearly free — Southern Bavarian costs a fraction of a point of prestige — and it buys levies, cheaper coring, and, importantly, more control in accepted-culture provinces. Distant cultures cost far more; Slovenian runs around ten times the price of a close culture, so accept it only when you actually need it for expansion, not speculatively. Releasing a historical subject from conquered land is a neat trick: it hands you claims on their core provinces, which cuts your conquest cost on those provinces substantially. The one subject you should not release is a custom Hungary — there is no clean historical subject for it and you do not want a resurgent Hungary on your border anyway. Release smaller custom subjects instead.
Mistakes That Quietly Kill Austrian Campaigns
Most Austrian campaigns are not lost to bad wars. They are lost to small, invisible errors that compound for decades before the player notices. These are the ones that matter.
- Going to war before the conciliatory track is maxed. This is the big one. War reverses the conciliatory progress that powers your entire reputation engine. An early conquest feels productive and costs you the very thing that makes Austria unstoppable. Max conciliatory first, always.
- Creating a market on day one. A new market starts with zero food stockpile, triggers a massive food-import spike for months, and can bankrupt a small nation before it recovers. Build wheat and granaries near Vienna first, then market.
- Stripping noble privileges early. The stability cost of removing a privilege scales with the estate's power, and the nobility starts powerful enough to drop you from high positive stability deep into the negative. Weaken the nobility gradually through laws and social values, never by yanking privileges.
- Ignoring court cost. It is a percentage of your entire tax base, not a trivial line item. "I'll take a little more court cost" is a trap that quietly eats your budget for a century.
- Blob-expanding inside the HRE. Antagonism is higher inside the Empire, aggressive expansion is dangerous even for two provinces, and you need living member states to pass laws. Two locations per war, then a truce. The scalpel, not the sword.
- Forgetting the emperor's alliance problem. The AI does not consider the emperor's allies when deciding to attack HRE members. Without strong allies — Bohemia, France, Brandenburg — you will get steamrolled while technically running the Empire. Build the alliance web and maintain it.
- Ignoring the Black Death. It arrives from Italian ports and can take a third of your population even with preparation. Build hospitals in your two or three biggest cities before it lands, and do not click "isolate country" during the plague — it is useless and applies a bad modifier.
- Letting the cabinet sit idle. A cabinet seat doing nothing is wasted money. Keep your counselors assigned to culture conversion, control, or centralization at all times.
- Chasing the AI across the map. Big armies are slow, combat width in rough terrain is tiny, and chasing enemies burns armies to attrition. Hold defensive terrain, defend your castles, and let the AI break itself on you.
FAQ
Why is Austria considered the best nation in EU5?
Because its diplomatic reputation converts into antagonism reduction so efficiently that it can conquer land while facing almost no coalition consequences. Every other Austrian strength — the subject-heavy expansion, the HRE law game, the cheap wars — flows from that one conversion. Stack reputation, and the normal cost of expansion stops applying to you.
Should I go to war early as Austria?
No. The conciliatory track that powers your reputation engine rises in peace and is set back by war, so the correct opening is deliberately peaceful. Max conciliatory, build crown power and the mine economy, and only then start your first war — which should be a preemptive strike on Hungary, fought on your terms.
What is the first thing I should build?
Crown power and food. Take the Autocracy crown privilege for free crown power, favor the ruler in law, and build wheat production near Vienna before you even think about creating a market. The market comes only after your food production can survive the import spike it triggers.
How do I become Holy Roman Emperor?
Improve relations with every elector using your diplomat capacity. The election fires when the sitting emperor dies, and Austria is elected automatically if elector opinion is decent. The crown is then a relationship you maintain, not a prize you keep forever — keep elector opinion high to hold it.
How do I pass HRE laws reliably?
Hover the law mid-vote to see each prince's vote and reasons, then bribe the electors voting against you, because they carry far more weight than ordinary princes. The underlying stats that sway votes are diplomatic reputation, opinion of you, and Habsburg dynastic power — the same things you have been building all game. Never start a debate during a war, when Imperial Authority drops.
How do the numbers change between patches?
They move constantly, so do not memorize them — read them. The antagonism-reduction rate shows in the diplomatic reputation tooltip, crown-power penalties are listed in the crown power panel, market cost is on the market screen before you commit, and law requirements are on each HRE law. The principles on this page — stack reputation, centralize, build off the mines, play the Empire as a law game — have held across every patch; the specific figures are things you confirm in-game in seconds.
Is dismantling the HRE worth it?
Usually not. It requires pushing a large share of imperial land into non-member hands, triggers a major religious civil war, and demands years of tedious setup. By the time you qualify, the law game will already be handing you the Empire's income. Treat dismantling as optional flavor, not the goal.
Next Reads
- EU5 Beginner Guide: First 50 Years — the full opening checklist for any nation, if Austria is your first EU5 campaign.
- EU5 Diplomacy Guide — antagonism, coalitions, subjects, and the reputation system Austria is built on.
- EU5 Estates and Crown Power Guide — satisfaction thresholds, privileges, crown power, and parliament in depth.
- EU5 Control Guide — why rivers, roads, and capitals decide how much of your country you actually own.
- EU5 Economy Guide — the tax-base pipeline, markets, and minting explained.
- EU5 Trade and Markets Guide — how resources actually reach your treasury.
- EU5 Warfare Guide — levies, supply, sieges, and early-era combat for your Hungarian and HRE wars.
- Hungary First 50 Years — your first opponent, and the quiet land-only sandbox to play once Austria is second nature.
- EU5 Buildings and Production Methods Guide — the processing layer that turns silver and gems into jewelry income.
- EU5 Bankruptcy, Loans, and Minting Guide — managing the inflation a precious-metals economy creates.