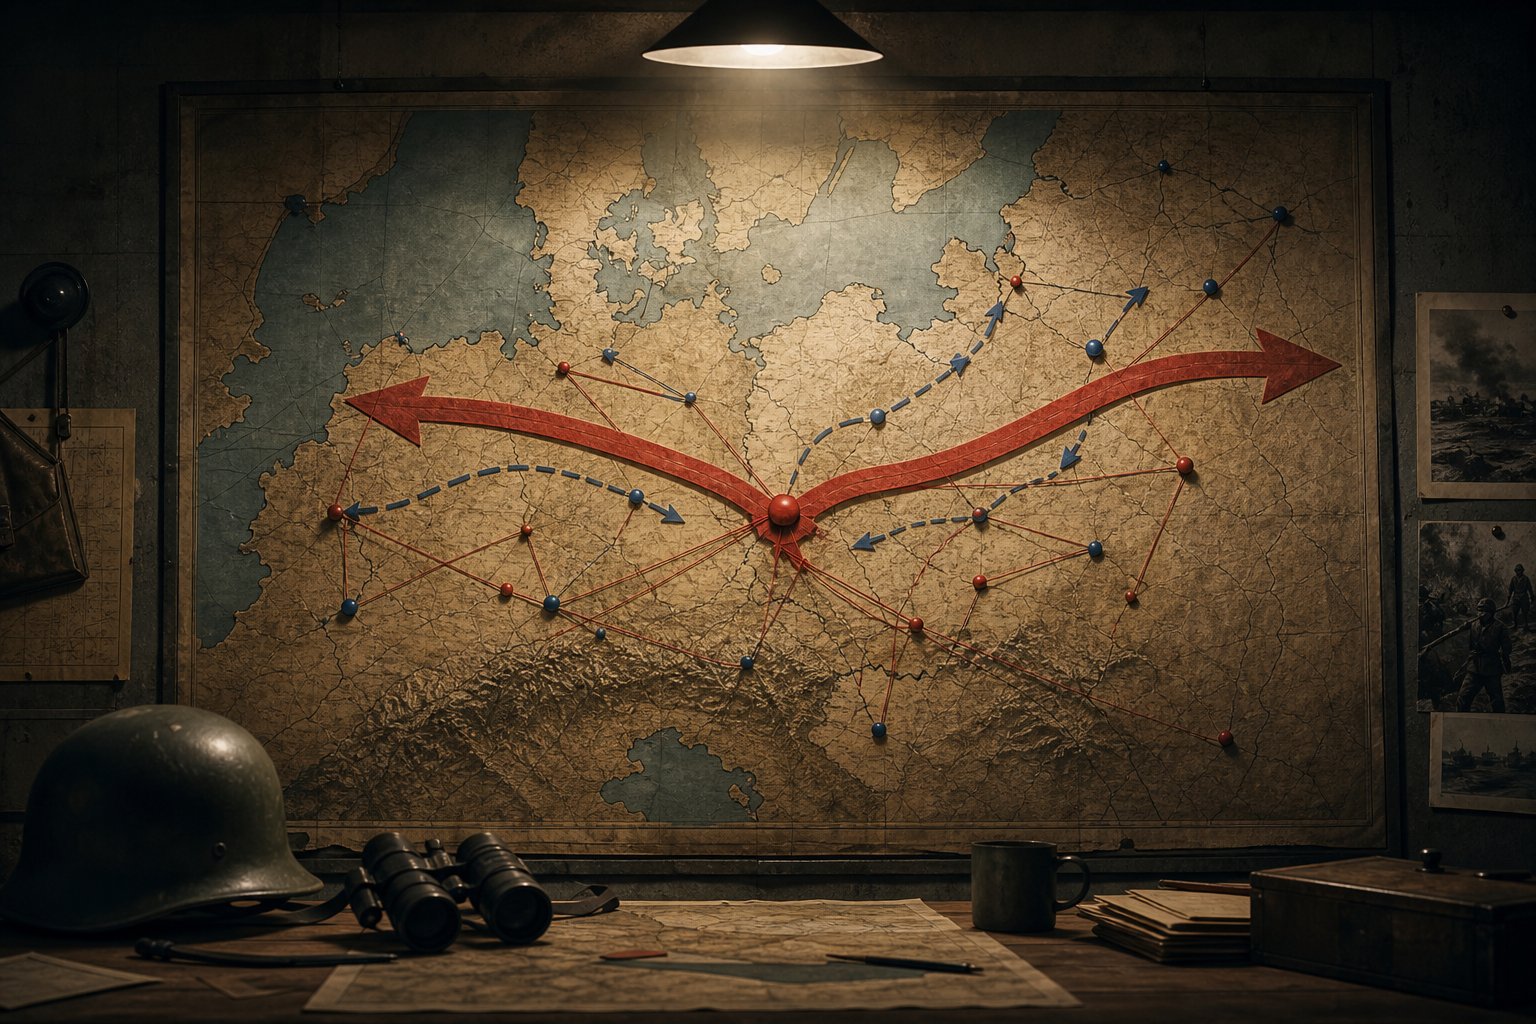
Ask ten veterans why Germany is the default first country and you will get ten versions of the same answer: Germany is the only major power whose campaign is a sequence. Everyone else opens into a sandbox. Germany opens into a script — rearm, absorb your neighbors through focus-driven pressure, fight one enemy at a time, and grow faster than the coalition forming around you. That script is the tutorial. Follow it and the game teaches you its systems one at a time; improvise early and every system arrives at once, on fire, with the Royal Navy off your coast.
The strategic puzzle underneath everything is the two-front war. Almost every decision you make as Germany is about solving that puzzle before it forms: knock Poland out alone, then face France alone, then deal with Britain alone, and only then turn east with the whole continent's industry behind you. The moment you let two great powers fight you at the same time, you are playing a different, much harder game. This guide gives you the mental model first — the three engines that actually carry a Germany run — and then the concrete route, phase by phase, with the judgment calls veterans disagree about laid out so you can make them yourself.
The Three Engines That Carry Germany
Every successful Germany campaign runs on three engines. If a phase of your campaign is failing, one of these three is the reason, and reading them in order tells you which one.
Engine one: industry wins wars before they start. The design philosophy for your entire economy is four words — first more, then better. A country that produces twice as much mediocre equipment beats a country that produces half as much excellent equipment, because production efficiency compounds and stats do not. Germany's focus tree gives you an industrial head start over every other European power; your job is to not throw it away on twelve small production lines. Keep your lines few and long, pour factories into whatever raises output and efficiency, and only then start chasing soft attack and breakthrough. The production efficiency cap — the green bar on your production screen — is quietly one of the strongest stats in the game, because it decides how much you can make at all. Everything else is decoration on top of it.
Engine two: air is king. Once you own the sky, the ground war becomes a walk. Fighters deny the enemy air force, close air support melts his divisions, and your armor advances without ever fighting an entrenched enemy at full strength. The stat beginners never look at is range: a fighter that cannot reach the battle does not exist, no matter how good it is. Design and research for range first. And understand that air power runs on technology tier, not numbers — a modern airframe flown by trained pilots decimates a larger force of obsolete planes. You do not win the air war by building more; you win it by building newer and flying it where the fight is.
Engine three: armor exists to destroy armies, not to take land. The goal of an offensive is never to kill every enemy soldier or paint every province. The goal is to capitulate the country quickly — the surrender progress bar on the enemy's country screen is the only victory condition that matters. The method is encirclement and annihilation: punch through with armor, meet behind the enemy's front line, and destroy his divisions in pockets so they cannot withdraw. The AI is excellent at refilling damaged divisions with fresh equipment and terrible at replacing destroyed ones. A unit you push back you will fight two, three, four more times. A unit you encircle you fight exactly once. Territory falls as a byproduct; if the enemy army no longer exists, nothing can stop you from taking it at your leisure. Infantry's job in all of this is humble and essential — it holds the line, follows the armor, and closes the pockets.
There is a clock on all of this, and understanding it is what separates a Germany that wins from a Germany that stalls. The German economy runs on borrowed money. Rearmament expenses grow every month, eating an ever larger share of your civilian factories as consumer goods, and the wartime economy converts that debt into a conquest timer that climbs faster the more foreign territory you occupy directly. You repay the loan by seizing the gold reserves of every capital you take and by reaching economic self-sufficiency through your focus tree — and if you do both, the penalty disappears entirely and your stolen economy outproduces everyone. That is the whole trick: Germany's economy is a loan, and victory is the repayment schedule. Win fast and the design is unbeatable. Stall, occupy everything yourself instead of puppeting it, and the economy eats you alive. This is why the historical route is a race disguised as a conquest, and why "puppet, don't occupy" is nearly always the right answer.
The 1936–1937 Buildup
The first eighteen months are the most consequential part of the campaign. Every factory you place well in 1936 compounds for the rest of the war, and every research slot wasted on something cosmetic shows up as a missing airframe in 1940. The good news: the opening plays itself once you know the priorities.
Construction. Build civilian factories until early or mid-1937, then switch hard to military factories. Place everything in states that already have high infrastructure — the Rhineland, Moselland, Westfalen, Hessen — because built infrastructure stacks with existing infrastructure to give you a construction speed bonus, and some of these states carry dam modifiers that stack again. Max a state's infrastructure, then fill its build slots with factories; slot a few synthetic refineries into your best states, because rubber will be your Achilles' heel the moment the war starts and imports dry up. Queue civilian factories in adjacent states so your builders chain from one job to the next without walking across the map.
Research. Keep one or two slots on industrial technology at all times — construction, production, and above all machine tools, because production snowballs and the earlier you get advanced machine tools, the more every factory you ever build produces. Industry is the most important thing to research; everything else can be secondary. Then the rifle, then the air tree started early and worked backward: the 1940 fighter airframe alone takes on the order of four hundred days, so count back from the war you know is coming and start range improvements, heavy machine guns, and engines in time. Begin the 1938 medium tank around mid-1937. The tech card shows you the exact research time — the skill is not knowing what to research, it is counting backward from the date on your focus tree.
Production. You start with just under thirty military factories. Put the majority on infantry equipment, add lines for support equipment, towed artillery, and towed anti-air, and let them run. For the navy: reduce every queued ship to a single copy, push the capital ships to the back of the queue, and let a couple of dockyards per hull finish them in a cascade before the war — you will barely use this fleet, and that is fine. Around the end of 1937, when your rifle stockpile is comfortable, pivot: leave a handful of factories on rifles and move the rest onto fifteen fighters, five close air support planes, and fifteen medium tanks. Do not build the 1936 aircraft at all — they are obsolete on arrival, and those factories are better spent on guns. One easily missed step: military industrial organizations are not assigned to your starting equipment automatically. Open each starting variant and assign the designer by hand, and when you choose designers, take the production bonuses first and the combat stats second. More planes now beats better planes later.
The economy fork. Your focus tree offers a genuine choice early on, and veterans disagree about it — which means it is worth understanding rather than memorizing.
| Four Year Plan | Prioritize Economic Growth | |
|---|---|---|
| The deal | Stronger industry immediately, in exchange for a consumer-goods penalty that grows every month. | A recovering-economy debuff now, removed piece by piece through follow-up focuses; no rearmament debt at all. |
| How it resolves | Seize gold reserves from conquered capitals and take the self-sufficiency focus — the penalty vanishes and flips into a bonus. | Currency reforms, tax cuts, and labor focuses strip the debuff; switching to a war economy restores the rest. |
| Wins when | You capitulate countries fast. Every gold payout is a massive consumer-goods cut, so the plan rewards aggression. | You expect a long game. Past roughly 1942 the debt-free economy outproduces the Four Year Plan in almost every scenario. |
| The trap | The wartime event offering to cancel the rearmament program. The "too expensive" option permanently breaks your economy. Never click it. | A weaker early industry and a weaker 1939 army if you dawdle on the follow-up focuses if you dawdle on the follow-up focuses. |
Laws, advisors, and political power. Political power is a flow, not a savings account — never let it sit idle. Hire a chief of army on day one, because the daily army experience is the entire reason these advisors exist, and swap to an attack-focused chief once your focuses unlock him. Push war support over fifty percent — the propaganda appointee in your inner circle does this — so you can take the war economy law, which unlocks the industrial potential of a strong country. Take a construction-speed advisor, a labor minister for the factory output, and keep stability as close to one hundred as you can get it: stability drives political power gain, consumer goods, and factory output at the same time.
Fuel and resources. Fuel will never warn you when it runs out — there is no insufficient-resource alert for it, and a tank army at zero fuel is a row of bunkers. Build a handful of fuel silos during the buildup, keep a large reserve, and buy oil from the United States and the Soviet Union before the war closes the trade routes. Prefer trading with land-connected partners who need no convoys, and with countries you will never fight. Rubber comes from the synthetic refineries you slotted into your best infrastructure states.
The free neighbors. Rush the Anschluss — the faster it lands, the faster Austria's factories and gold become yours. The demand succeeds when your army dwarfs Austria's, and you can manufacture that gap cheaply: a template containing a single cavalry battalion costs almost nothing and trains fast, so queue dozens of them at high equipment priority, deploy them green, and flip the whole template to infantry later. You now field an army that registers as enormous on the diplomacy screen and costs you nearly nothing to keep. When the Austrian political event fires, always take the option that spends a little political power to ease the annexation — the other one does virtually nothing. Czechoslovakia falls the same way through the focus tree, and every country you absorb without a war is factories you never had to fight for.
Army, Air, and the Spanish XP Farm
Army experience is one of the most important currencies in the game, and before 1939 there is exactly one good way to earn it: the Spanish Civil War. Send volunteers to the Nationalists — a handful of divisions plus a fighter wing and a bomber wing is enough to decide the war — and set their reinforcement priority to elite so your newest equipment flows there first. Prepare all your volunteer groups before sending any of them, then send them simultaneously; sending groups one at a time quietly shrinks the maximum number you can field. Fight on plains, not mountains, let your battle plan's planning bonus build before you attack, and take the focus that boosts your volunteers' experience gain. The war itself is a bonus; the experience is the point. An advanced wrinkle worth knowing: the side that is losing drags the war out, and a longer war means more experience — so helping the underdog slightly can pay for itself.
Spain is also where you learn general trait grinding, which is the difference between a mediocre officer corps and a great one. Traits earn toward progress only while a general fights the way the trait wants — armor for the armor trait, river crossings for the engineer trait, forests for the ranger trait. The exploit: fight the relevant way until a trait sits at ninety-nine percent, then deliberately stop meeting its criterion — change terrain, change behavior, or convert the division templates under him — so that trait freezes while the others keep accruing at full rate. Finish them one by one at the end. Two rules make this work: never let a general actually unlock a trait until everything you want is parked at ninety-nine, because each trait a general holds makes the next one more expensive; and never grind on a general with a background trait, because background traits reduce army experience gain.
The doctrine fork. You will be offered a real choice of land doctrine, and again it is worth understanding rather than copying. Grand Battle Plan rewards patience: it maximizes the planning bonus, breakthrough, and soft attack, and turns every prepared offensive into a sledgehammer. Mobile Warfare rewards momentum: it trades some of that punch for speed and coordination, and its later nodes buff the infantry battalions embedded inside your tank divisions, letting you pack more tanks per division. Both carry a Germany campaign all the way to the Urals. Pick the one that matches your temperament — methodical planner or constant attacker — because the only truly losing move is switching doctrines halfway through and rebuilding every template mid-war. Whichever you choose, take the army spirit that makes armor and motorized template edits nearly free; it saves a fortune in experience over a campaign.
Templates. Keep it simple. Your infantry is essentially the starting template, adding support anti-air whenever production allows — anti-air is disproportionately strong, shredding the enemy's light aircraft while counting as a real combat battalion. Your armor division evolves in stages: light tanks with motorized infantry in Spain, then medium tanks with motorized (later mechanized) infantry, a self-propelled artillery or flame-tank element, and support companies — signals, logistics, assault engineers, and a flame company. Read the combat width number in the combat tooltip rather than memorizing a target; the practical lesson is that attacking from more angles puts more of your divisions into the fight at once, so always prefer targets you can hit from several sides. Your garrison template is a single cavalry battalion with the local police occupation law — anything more is wasted manpower. For your second campaign, know that an armored division built around self-propelled artillery and raw soft attack can push through almost any combat modifier, at the price of roughly double the supply use; when balance changes touch self-propelled guns, the identical layout rebuilt around medium tanks works the same way.
Equipment design. With the tank designer, one trick pays for itself immediately: developing the flame tank grants a free first design, so design your real medium tank as a flame tank — three-man turret, flamethrower, heavy machine guns, wet ammunition storage, Christie suspension, armor and engine tuned to about eight kilometers per hour — then swap the flamethrower for a medium howitzer and upgrade the engine. Your actual medium tank now costs a handful of experience instead of a full design. For fighters, the recipe is a big engine, a row of heavy machine guns, armor plates, and both self-sealing and extra fuel tanks, because range decides whether your fighters reach the battle at all. Close air support wants a bigger engine, bomb locks, dive brakes, and extra tanks. Air doctrine goes centralized control first for mission efficiency and detection, then the fighter and strike trees. Train your pilots in daylight only — rookies crash far more at night — merge scattered wings into full-strength ones before committing them, and never send a level-one wing into combat; level two is the minimum that functions. The air superiority and CAS guide covers missions and wing sizing in depth, and the division templates guide has the full template library.
Poland: Your First Blitzkrieg
Poland exists to teach you the combat method that wins the entire war, at stakes low enough that you can afford to learn it slowly. The Polish army is no match for your starting force — this fight is almost as easy as pressing one button — so treat it as a live-fire exercise in encirclement, not as a threat.
The method: put your armor on the plains tiles, draw offensive arrows toward Łódź and Warsaw, and plan a pincer — one armored group punching deep from the west, another pushing from East Prussia, with the meeting point somewhere behind the Polish border army. Infantry follows to plug the gaps and hold the shoulders. Concentrate your fighters over the front for air superiority and spread your close air support across the regional airbases. Danzig is demilitarized until the war starts, so a detachment can simply walk in. Do not press the mass-attack button and watch; push methodically, and deliberately stop and restart offensives to regroup when a spearhead overextends. A well-run Poland capitulates to ninety percent inside a week and is fully done in about ten days, with your casualties a fraction of theirs and your captured equipment numbering in the tens of thousands of guns. Use the combat time to finish grinding your generals' traits — this is the cheapest combat experience you will ever get.
Two peace-conference decisions matter more than they look. First, do not puppet Poland — release it as a small state or annex and partition it instead, because a German-puppeted Poland gets attacked by the Soviet Union and drags you into the eastern war on someone else's schedule. Second, if you signed the non-aggression pact with the Soviets, honor the territorial split when the treaty event fires; refusing it breaks the pact early and hands Moscow a war goal. The battle plans and frontlines guide explains the planning bonus mechanics that make this whole method work.
The Fall of the West
The western war is one lesson about attack order. France has heavy fortifications along your shared border and essentially none along its borders with Belgium and the Netherlands — so the historical route goes through the Low Countries, and the order in which you take them is not flavor, it is mechanics. Belgium masses its entire army on the German border and leaves the Belgian–Dutch border nearly undefended. Declare war on the Netherlands first: the terrain is open and armor-friendly, your tanks drive for Amsterdam and The Hague, and the country is dead in days. Only then declare on Belgium — with the Dutch border open, your armor pours into Antwerp, Ghent, and Brussels before Belgium can redeploy, and Belgium capitulates by event the moment a key northern province like Antwerp falls. Now France's entire northern flank is exposed.
Do not touch the Maginot Line. Attacking level-ten fortifications head-on is suicidal, and you never need to: your armor goes through the northern French plains, rushes the coast, and cuts south toward Paris. France carries a disjointed-government penalty that halves its surrender threshold — read the actual number on France's country screen before the war and plan around it. In practice, taking Paris and Le Havre ends the war; the whole western campaign, from the first declaration on the Netherlands to the French armistice, takes on the order of ten days. Always accept the formation of Vichy France, and seize the gold reserves of every capital you occupy — Dutch, Belgian, and above all French gold is what turns your rearmament debt from a crushing penalty into a bonus. That is the Four Year Plan working exactly as designed.
Timing is the hidden objective. Finish the western war before early 1941, because that is when Japan's expansion drags the colonial powers and then America into the war against you, and sign the non-aggression pact with the Soviets before you finish Britain so the eastern border stays quiet. Denmark capitulates within hours of your declaration — take the puppet option. Norway falls to small naval invasions leapfrogging up the railway from the south, taking Oslo and the ports before the British can reinforce them; garrison the Norwegian naval bases afterward. Sweden, on the historical focus path, folds to escalating pressure events and grants you military access and resources without a fight.
| Target | Why this order | The method | Done when |
|---|---|---|---|
| Netherlands | Open terrain; its fall opens Belgium's undefended north. | Armor straight to Amsterdam, The Hague, Rotterdam. | Capitulation in days; Dutch gold seized. |
| Belgium | Its army is stacked on your border, facing the wrong way. | Armor through the opened Dutch border into Antwerp and Brussels. | Capitulation event fires when the north falls. |
| France | Its forts face Germany; its north faces nobody. | Armor to the coast, then south to Paris; shift your air as the front moves. | Paris and Le Havre trigger surrender; form Vichy. |
| Denmark and Norway | Secure the northern flank and the naval bases before Britain does. | Denmark by declaration; Norway by leapfrog naval invasions along the rail line. | Puppet Denmark; garrison Norwegian ports. |
Operation Sea Lion
Britain is the phase most first campaigns skip, and the phase most veterans insist on. A living Britain means bombers over your factories, a Royal Navy strangling your convoys, and eventually a second front landing in France while you are deep in Russia. Taking the island is cheaper than it looks — but only after you internalize the gate: without sustained air superiority, nothing else matters. Naval bombers and close air support cannot do their work under contested skies, and an invasion fleet crossing the Channel into a live Royal Navy is a donation of your army to the sea.
So the air war comes first, and it is a concentration problem. Park your fighters over northern France to deter bombing runs, then mass every remaining fighter near Calais with orders over southern Britain. The goal is to force the Royal Air Force up and destroy it, countering it wherever it appears until the sky is yours. With air superiority established, put your close air support on naval strike over the Channel: damaged British ships limp back to port for repairs, and every ship in port is a ship not contesting your crossing. A powerful alternative is massed naval bombers, which do not just win the Channel but make it uninhabitable — the British AI will stop sending its fleet into a sea zone where it keeps dying and effectively bench its own navy. Before you commit, zoom into southern England and count the divisions standing there; Britain garrisons its own island properly now, and that number tells you honestly whether you have enough air and armor.
The invasion itself has hard limits the game shows you directly: the naval invasion planner displays how many simultaneous invasions you may run, how many divisions each can carry — it starts small and grows with research — and the minimum planning time, which research shortens. Read those numbers on your own screen instead of trusting anyone's fixed values. Do not pour a whole army group into the beachhead; you cannot supply it, and stacked divisions in one port eat the supply your armor needs. Land one or two infantry armies plus all of your armor in two invasions aimed at the Dover and Portsmouth areas, with your fleet on invasion support and hundreds of close air support planes overhead. The moment the armor is ashore, the campaign is decided: tanks drive for Bristol to cut off Cornwall, run the Midlands plains, take the Liverpool–Hull line, and encircle London. There is no defense against eight armored divisions in open English countryside. Keep your surface ships disengaged and hidden when they are not covering the crossing — a caught fleet is a dead fleet.
Barbarossa: Beating the Soviet Union
The Soviet Union cannot outfight a Germany that has already eaten Europe — but it can outlast one, and the difference is entirely your management of time and supply. The purges leave the Red Army weak in the early war years, and every season you wait it recovers and its division count climbs toward what feels like infinity. The classic window is summer 1941; if the West is already finished, going earlier is strictly better. Two preparations are non-negotiable: secure a non-aggression arrangement with Japan before early 1941 or you will be stabbed in the back, and build an intelligence network in the Soviet Union. Collaboration governments prepared before the war lower the Soviet capitulation threshold dramatically — with two in place, taking Leningrad, Moscow, and Stalingrad ends the war, where without them you would be fighting all the way to Siberia.
The campaign itself is a supply problem wearing a war's clothing, and the supply guide is required reading before you cross the border. In practice: upgrade the railways from Berlin to your front to the highest level, because hub capacity scales with rail level and your offensives will otherwise starve a hundred kilometers short of their objectives. Armor advances along railways from supply hub to supply hub — Minsk, then the next hub, then Kiev — never wandering into the spaces between. When your tanks outrun their supply, raise the army group's motorization priority to extend the hubs' reach, at the cost of trucks. Fight on plains and go around the marshes, which carry brutal attack penalties; delay the offensive for spring rather than attacking through snow.
Combat is the encirclement method at maximum scale, and it works better here than anywhere else in the game. Concentrate your armor on a few axes, punch pincers around the great salients — the Baltics, Białystok, Minsk, the Kiev pocket, Odessa — and let the infantry close the rings. The Soviets will pour fresh equipment into damaged divisions forever, but they cannot replace destroyed ones, and the pocket bags run into the hundreds of thousands, then millions, of eliminated troops. Stop and restart your offensives deliberately to keep your own losses trivial; a casualty ratio of ten to one is the normal result of a well-run Barbarossa. Supply is the only thing that ever stops you, and by the time the advance stalls deep in Russia, the Red Army no longer exists in any meaningful sense — the rest is a victory-point slog toward Sverdlovsk and beyond.
The peace deal is where first campaigns quietly ruin themselves. Do not occupy the Soviet Union directly. Occupation feeds the conquest timer, costs garrison manpower you do not have, and — the fatal one — gives you a long undefended border with Japan, who will break the non-aggression pact and declare war the moment he has war goals on your South-East Asian puppets. Puppet the Soviet state and use the occupation office to spin conquered territory into subordinate administrations, each of which removes garrison needs and tightens your control. Direct occupation is rarely the right answer anywhere in this campaign; in Russia it is a losing move disguised as total victory.
The Mistakes That Actually Lose Games
Germany is strong enough to survive most errors, but these are the ones that actually end campaigns. Every one of them is a misunderstanding of a principle above, not bad luck.
- Clicking the "too expensive" option on the wartime rearmament event. If you took the Four Year Plan, the bottom option of that event permanently disfigures your economy with no recourse. There is no recovering from it. The top option is the only option.
- Declaring on all three Benelux countries at once. Belgium stacks its whole army on your border. Taking the Netherlands first is what opens Belgium's empty northern border — declare on all three simultaneously and you fight the version where Belgium is ready.
- Charging the Maginot Line. Level-ten fortifications, attacked head-on, will break your army for nothing. The entire western route exists to go around them.
- Training pilots at night and committing green wings. Rookie pilots crash far more in the dark, and a level-one air wing is terrible in combat. Train by day, merge wings to strength, and deploy at level two at the earliest.
- Flooding a beachhead with a whole army group. You cannot supply a stacked port, and every unsupplied division is one that cannot fight. Invade with one or two infantry armies and your armor, not everyone you own.
- Letting fuel hit zero. There is no warning. A tank army without fuel is a static defense line, and the blitzkrieg simply stops. Silos, reserves, and pre-war oil imports are not optional.
- Pressing the big red attack button and walking away. Mass attacks are fun when they work and ruinously expensive when they do not. Push methodically toward supply hubs along railways, and stop to regroup when a spearhead overextends.
- Occupying instead of puppeting. Every province you hold directly feeds the conquest timer and eats garrison strength. Spin foreign territory off to puppets and occupation administrations; keep only what you must.
- Puppeting Poland at the peace conference. The Soviet Union attacks German-puppeted Poland and drags you into the eastern war before you are ready. Annex, partition, or release small — anything but a puppet.
- Letting political power and experience sit idle. Unspent political power is wasted factory output and unpassed laws; hoarded army experience is a weaker officer corps. Spend both continuously.
- Attacking through marshes, mountains, and snow. The terrain and weather penalties are not suggestions. Fight on plains, go around the marsh tiles, and wait for spring.
- Finishing Britain before the eastern pact is signed. The non-aggression pact and certain wartime industry focuses need to land before the western war closes. Sequence the diplomacy ahead of the final offensive.
FAQ
Is Germany the best first country in Hearts of Iron 4?
Yes, for most players. Its focus tree hands you a structured campaign with obvious milestones — rearm, absorb your neighbors, fight one enemy at a time — and its starting industry is large enough to forgive early mistakes while still punishing the lazy habits you need to unlearn. If Germany feels overwhelming, the game itself is still new to you; start with the HoI4 beginner guide and come back.
Four Year Plan or Prioritize Economic Growth?
Take the Four Year Plan if you intend to fight the historical fast war — Poland in 1939, France in 1940 — because the gold you seize from conquered capitals keeps repaying the debt and the self-sufficiency focus eventually removes it entirely. Take Prioritize Economic Growth if you know you play long, sprawling campaigns, because a debt-free economy outproduces the Four Year Plan past roughly 1942. Both win; the only true mistake is taking the Four Year Plan and then clicking the wartime option that cancels the rearmament program.
When should I attack Poland?
As soon as your focus path delivers the war goal — the Danzig crisis gives you a deadline, and the historical AI waits for it. Your readiness check is three things: rifle and artillery stockpiles in the green, your air wings trained to at least level two and positioned, and a planning bonus built up on your offensive lines. If all three are true, go; Poland is the exam you take to learn combat, not the exam you must be perfect for.
Do I have to invade Britain, or can I skip straight to the Soviet Union?
You can skip it, and many campaigns do. The cost of skipping is a living Royal Air Force bombing your factories, a Royal Navy raiding your convoys, and a high probability of an Allied landing in France the moment your army is deep in Russia. Sea Lion is far cheaper than it looks once you own the air war, and a pacified western edge makes Barbarossa dramatically safer. For a first campaign, do it once — the lesson is worth more than the time.
Why does my advance always stall in the Soviet Union?
Supply, almost certainly. Your divisions are not too weak; they are hungry. Upgrade the railways behind your front, advance hub-to-hub instead of into open space, raise motorization priority when spearheads outrun their hubs, and concentrate on a few axes so your logistics are not stretched across the whole front. The supply guide walks through every lever.
Mobile Warfare or Grand Battle Plan?
Both carry a Germany campaign to victory, so pick by temperament: Grand Battle Plan if you like prepared sledgehammer offensives with big planning bonuses, Mobile Warfare if you like constant momentum and denser tank divisions. The losing move is choosing one, then switching to the other halfway through the war and rebuilding every template while the enemy rebuilds nothing.
What settings should a first Germany campaign use?
Historical AI focuses on, so the world follows the script this guide assumes, and regular difficulty. Ironman is a personal challenge toggle that changes nothing mechanical except locking you out of the console — if you want the option to debug a stuck save, the console commands guide has you covered. Leave the game at full speed while idling on focuses and slow to a deliberate pace the moment war starts; most expensive mistakes happen at speed four.
Next Reads
- HoI4 Beginner Guide — the interface, systems, and first-hours checklist this guide assumes.
- HoI4 Supply Guide — railways, hubs, motorization, and why your Barbarossa stalls.
- HoI4 Air Superiority and CAS Guide — wing sizing, missions, and the air war that gates everything.
- HoI4 Division Templates — the full template library, from line infantry to the armor designs used here.
- HoI4 Battle Plans and Frontlines Guide — planning bonuses, offensive lines, and the orders that make encirclements work.
- HoI4 Special Projects Console Commands — debugging the research and project systems when a save misbehaves.
- HoI4 Country Tags Guide — the tag list you need for console work and multiplayer setup.