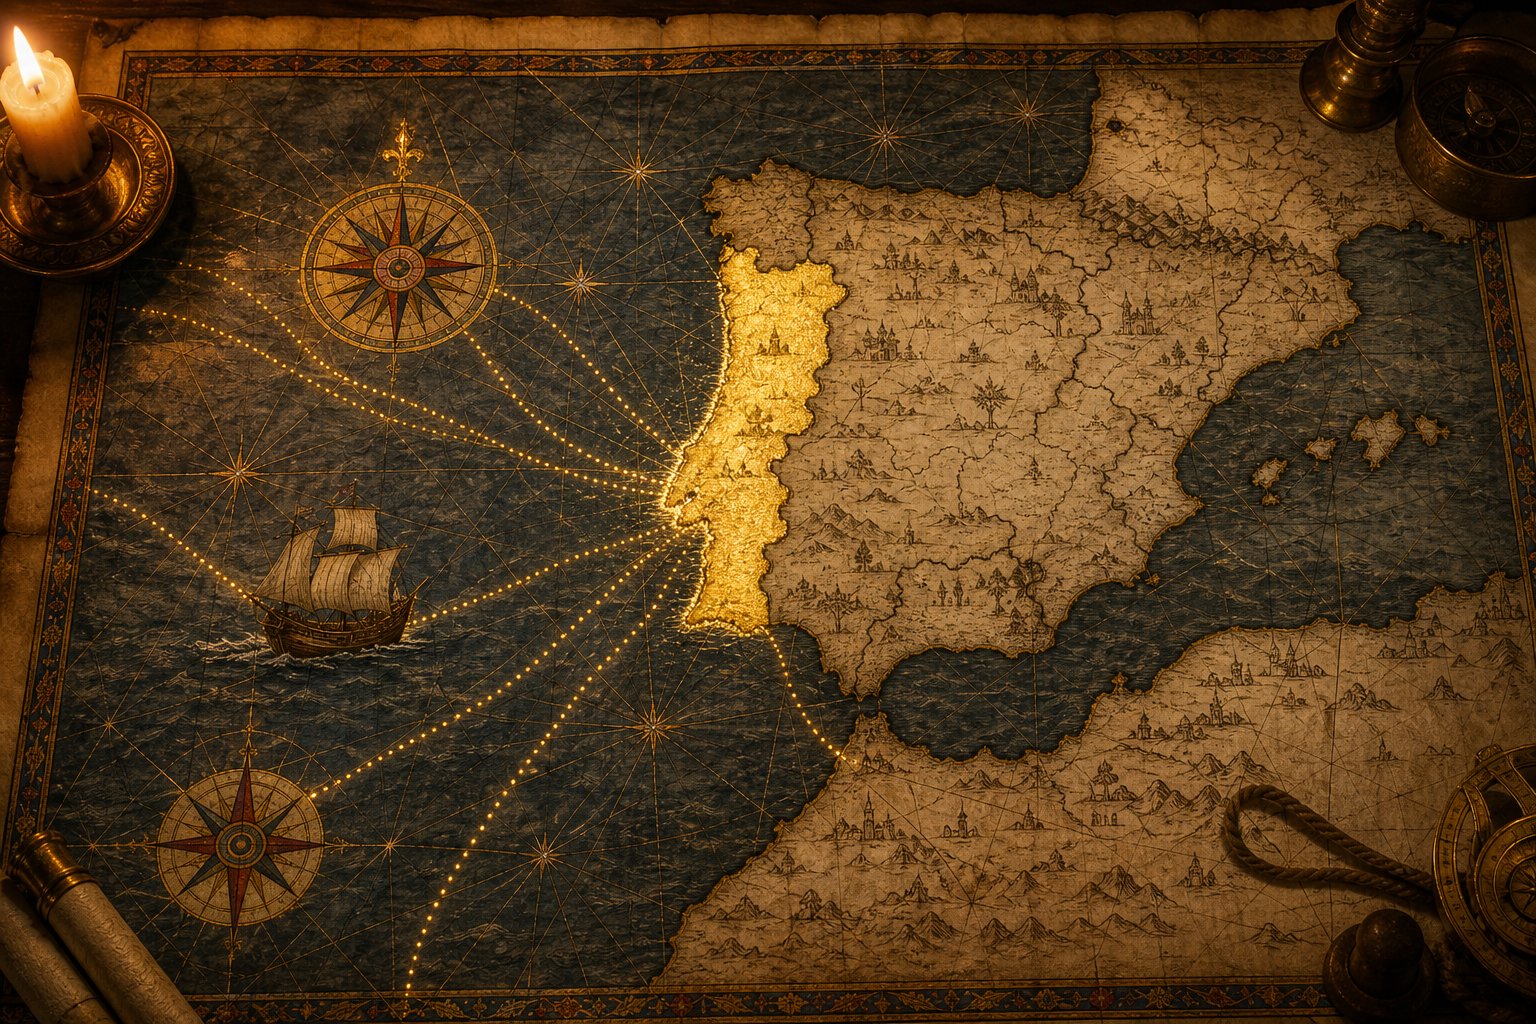
Portugal is the country a decade of EU4 trained everyone to reach for on instinct: small, coastal, colonial destiny, almost impossible to conquer. Europa Universalis 5 lets that instinct half-survive. The colonial destiny is real, and the conquest part is still true — nobody invades Portugal without going through Castile first. What changed is everything underneath. You start around the twenty-fourth power on the map, in the red, with no allies, a decaying friendship with a neighbor that could eat you in a season, and a population so thin that every person you ship overseas is a person your homeland stops having. Colonies are no longer a button you click and wait on. They are built from real people, and Portugal has almost none to spare.
None of this makes Portugal a bad campaign. It makes it a specific one. Played well, Portugal converts a geographic head start into a trade lead that wider empires never close — a small kingdom whose merchants out-earn countries with four times its population. The first fifty years exist to build the machine that performs that conversion: a positive budget, a permanent Castile friendship, a control network that reaches your whole coastline, and the technology ladder that opens the Atlantic. Rush any piece of it and you go bankrupt feeling busy. Sequence it correctly and the map opens exactly on schedule. If you are still choosing your first campaign, Best Starter Nations in EU5 puts Portugal in context, and the EU5 Beginner Guide: First 50 Years supplies the universal checklist this article assumes.
Why Portugal Plays Differently
Every Portugal mistake traces back to one misunderstanding: treating the country as a smaller Castile. It is not. Castile wins by being bigger than everything around it. Portugal wins by being earlier than everyone else. Your entire national identity is a head start — on exploration, on colonization, on the trade routes that head start opens — and a head start is only valuable if it compounds. The first fifty years are not about painting map. They are about protecting the compounding.
Three engines drive the compounding, and you will spend the whole campaign balancing them against each other.
Castile keeps you alive. Portugal has almost no conquerable front of its own, and the one neighbor that matters is many times larger. This is not a problem to solve; it is a condition to accept. The Castile friendship is the cheapest security guarantee in the game, and it stays cheap your entire campaign if you never do the one thing that breaks it. Every ducat you do not spend defending your land border is a ducat that goes to sea.
Trade makes you rich. Portugal's tax base will never impress anyone, and trying to win on tax base is trying to beat Castile at Castile. The Portuguese route is trade capacity: marketplaces at home, trade offices in friendly foreign ports, trading posts overseas, and eventually a merchant fleet that carries other nations' goods. A fully built tall Portugal earns the majority of its income from trade, and that income does not care that your homeland is a thin strip of coast. Crown power multiplies trade value, which is why the domestic political game matters even for a merchant nation.
Population makes everything real — and population is your scarcest resource. This is the EU5 shift that breaks EU4 habits. A colony is not a timer; it is a migration. Every settler who sails to Madeira is a laborer Lisbon no longer has, and Portugal's colonial advantages make it ship people faster than it regrows them. The catch-22 defines the whole campaign: the more aggressively you colonize, the more your homeland stagnates, and a stagnant homeland cannot fund more colonies. Every pop matters, especially once you start shipping half of them to Brazil.
Hold those three engines in your head and the entire opening writes its own priorities. Security before wealth, wealth before expansion, and expansion only at the speed your population can sustain. Portugal has genuine starting bonuses toward exactly this plan — a permanent bonus to infantry power, faster navy movement and navy tradition, a starting government reform that improves tax efficiency and sailors while cutting navy maintenance, and access to the Iberian carrack, a first-age light ship no one outside Iberia gets. Read the current values in your country overview's bonuses panel rather than memorizing them; balance passes move the numbers, but the direction never changes. Portugal is built to go to sea early and to pay for it with trade. Your job is to not go to sea early.
Before You Unpause: Fix the Arithmetic
Portugal's opening problem is not strategic. It is arithmetic. The budget starts negative, and every system that could fix it — trade, conquest, colonization — costs money you do not have yet. So the first move is subtraction, not addition. A new Portuguese campaign is won in the first five minutes of paused play, by deleting things.
Start with the forts, because the forts are eating you. Portugal begins spending roughly eighteen ducats a month on fortifications — on a starting income where that single line can be the difference between solvent and bankrupt. Forts also sit under a soft cap: exceed your fort limit and every extra fort costs progressively more maintenance, and with only one city, Lisboa, Portugal's limit is low. Delete every fort except the capital's. Once Castile is your ally there is arguably no reason to keep that one either. If you want the exact current numbers, the fort panel shows your limit and the per-fort overage — but the decision does not depend on them. A country with one neighbor and an alliance does not need fortifications.
Then cut the army you are not using. You are not at war, and early wars are fought by levies raised from population, not by the standing army that charges maintenance every month. Lower army maintenance to the floor and disband regular regiments you cannot afford. Set the fleet slider sensibly — you want your starting ships patrolling, not rotting in port — and set minting to break even at zero. Minting past break-even prints money and raises inflation, which silently increases the price of everything you buy; if you lack the gold and silver to mint against, fix that through trade first, not through the printing press. The bankruptcy, loans, and minting guide covers exactly when borrowing is correct and when it is fatal; at Portugal's start, it is almost never correct.
Legitimacy is the unlock, so treat it as a project. Portuguese campaigns have a curious property: push legitimacy to 100 and the starting financial problems largely disappear. Below 50 legitimacy everything degrades — crown power falls, rebels grow, income sags — and the maintenance cost of holding legitimacy at 100 is cheaper than the bribes you pay while it sits low. Put an advisor on raising legitimacy immediately, and let the spending slider do its work. Legitimacy is also the currency you will spend on estate privileges later, at roughly five points a privilege, so arriving at 100 with a full pool is a genuine head start. One warning that decides early dynastic events: if the heir's lover event fires, the only reliable way to prevent the affair crisis is to marry the woman. Letting the lover die can trigger a civil war, which is an expensive way to learn the mechanic.
Keep crown power respectable while you do all of this. Crown power drives two things Portugal cannot live without — trade value and parliament influence — and letting it collapse early can trigger a coup attempt. Hold it up around a third of its range until you are solvent and safe, then relax. Centralization, revoking privileges you no longer need, and high control all raise it over time; you will build toward it naturally.
Only now, with the budget near zero or positive, do you start adding. Two additions are always correct. First, upgrade your resource-gathering operations: even raw goods you have no factory use for still sell on the market, so an RGO upgrade is close to free money, and a warning icon at the top of the screen will tell you which goods your production is missing. Second, build marketplaces — in the capital first, then in every town you have, upgrading them as they pay for themselves. Everything else on the Portuguese build order waits on these two.
One last expectation to set: early income wobbles. Tax base can dip month to month for reasons that feel invisible, and a negative month in year two is not a crisis. Judge your budget in quarters, not in weeks, and keep a cash buffer for the months the arithmetic turns against you.
Castile Is Weather, Not a Rival
New players look at the Iberian map and see a rival. Experienced players see a fact. Castile is larger than you in population, army, tax base, and diplomatic weight, and it will be for the rest of the campaign. You do not compete with facts. You dress for them. The single highest-value diplomatic action in any Portuguese campaign is improving relations with Castile on day one, and the relationship you build in the first year is the one you coast on for the next century.
The start hands you every advantage for this. Portugal begins with a truce already running against Castile, and Castile sits only a handful of relation points short of an alliance — one improve-relations push closes the gap. Do it before anything else that touches diplomacy. The alliance buys you more than safety: it removes your only real land threat, grants military access for wars elsewhere on the peninsula, helps suppress the rebellions you will inherit in Granada, and guarantees that the friendship survives even a dynastic accident.
The accident is the personal union. If your heir situation produces a marriage union, Castile becomes the senior partner, and seniority matters in two ways. First, union policy votes are weighted by member power, so Castile outvotes you no matter how you cast your ballot. The survival trick is simple once you know it: always vote the same way Castile votes. A vote you lose while opposing Castile costs a painful chunk of estate satisfaction and pushes your nobles toward revolt; a vote you cast alongside Castile is a vote you cannot lose, because your side always wins. Abstaining does not save you — only voting with the senior partner does. Second, if the union becomes unbearable, the diplomatic action that places a relative on a foreign throne can break and reform the union while keeping your own king, letting you re-ally Castile immediately afterward. It is an escape hatch, not a plan.
You can also engineer unions in your favor: if you have a female heir and no male heirs, marrying her to another realm's heir produces a union your child inherits — and whether you are the senior or junior partner is decided by great-power score at the moment seniority settles. Against Castile you will usually lose that contest early. Against Aragon, later, you might not. Keep a weak Aragon in mind as a long-term dynastic target; a small union partner is an easy one to integrate.
Now the one rule that actually kills Portuguese campaigns, stated plainly: never ally Navarra, and think very hard before allying Aragon. Castile tolerates almost everything from you except alliances with its own rivals, and allying Navarra is the classic trigger that turns the neighbor aggressive. Portugal campaigns do not die to Castilian ambition. They die to Portuguese diplomacy. Rival Castile never, ally its enemies never, and the friendship holds for the entire game.
Point your rivalry elsewhere, because rivals matter: designate no rivals and the world reads you as peaceful, which makes your later wars generate extra antagonism and invites coalitions. Granada, Tlemcen, and Tunis are the natural Portuguese rivals — they mark your actual war targets, cost you nothing with Castile, and feed the antagonism system correctly. The diplomacy guide explains antagonism, coalitions, and alliance upkeep in full; the Castile first 50 years guide is worth reading anyway, if only to understand what your ally is doing while you go to sea.
The Economy a Small Coastal Nation Runs
Portugal's economy runs on a pipeline, and until you see the pipeline you will keep wondering where the money went. A production building's gross earnings are not your income. They enter the location's potential tax base, get reduced by whatever control that location is missing, get split among the estates by their local influence, and only then get taxed at the rate you set. A workshop that earns nine ducats can put four in your treasury, or two, depending on control and estates. The economy guide walks the whole pipeline; the part Portugal needs to internalize is the control end, because control is where a small coastal nation either cheats its way to wealth or strangles its own tax base.
Control spreads outward from your capital and decays with effective distance. Plains spread it easily, mountains block it, rivers act as highways, and roads cut through terrain that would otherwise isolate a province. Portugal's special trick is the sea. Maritime presence extends control along the coast and out to islands, and it is raised by exactly the things Portugal is good at: light ships like the carrack on patrol, coastal forts, and protected harbors in your port towns. Presence grows slowly early and rewards patience, but it is the difference between a coastal kingdom that owns its whole shoreline and one that nominally holds provinces it cannot tax. Set patrol missions across your seas rather than micromanaging ships — a fleet of roughly thirty with patrol orders auto-rotates to maximize coverage, and the admiral stat that drives presence is diplomacy, so put your most diplomatic sailor in command. Pin the sea-presence map mode and watch your coastal control climb. The control guide covers proximity, roads, and rivers in depth.
With control understood, the Portuguese build order follows one commercial principle: sell Castile what Castile lacks, never what Castile has in abundance. Castile will flood the shared market with cheap cloth, so demolish the starting cloth production in Lisboa and build what your neighbor must import. Portugal has iron in several locations, which means tools; it has marble and salt locations that pay for developing. Tools first, then marble and salt, with roads built out to the quarry sites so control actually reaches them. This is market judo — your giant neighbor is your best customer precisely because it is giant.
| Income rung | What it needs | When it pays | Mistake to avoid |
|---|---|---|---|
| RGOs and raw goods | Upgraded rural sites, roads from the capital | Immediately — surplus sells even with no factories | Waiting for money before upgrading; upgrades are what make money |
| Workshops: tools, marble, salt | Iron and quarry locations, burgher workforce | The first quiet decade | Building cloth to compete with Castile's flood |
| Marketplaces and trade villages | Towns with market access, then merchant upgrades | Once the budget is positive | Building ahead of your population; empty buildings earn nothing |
| Maritime control | Carracks on patrol, coastal forts, protected harbors | Ongoing, compounding slowly | Leaving pirates and low presence unaddressed |
| Trade capacity abroad | Trade offices in friendly foreign ports, overseas posts | Once crown power and paper supply allow | Funding it before exploration is a fraction of net income |
| Colonial extraction | The entire exploration ladder below | The Age of Discovery onward | Running three colonial regions at once |
The burghers are the estate that runs all of this, and they deserve your privileges; nobles and clergy matter less for production. Build marketplaces in the capital first and then everywhere you have a town, upgrade them into merchant quarters as they pay for themselves, and push your second-largest location — Porto, sitting next to the iron — toward city status for the extra building slots. A town of roughly thirty thousand people can make that jump; the location panel shows the exact threshold for your campaign, and a town granted port rights effectively counts as a large city for building purposes, which is how a thin coastal strip supports a dense economy. An Iberian-culture specialty, the lieutenancy, makes an excellent first governor for Porto — it can sit in a town rather than a city, but it needs a road back to the capital, so build the road first.
Two warnings keep the middle game honest. First, profitability is not automatic: a production building loses money when its input goods cost more than its output sells for, and the fix is always one of three levers — disable the building, raise the output's price through demand, or cut the cost of its most expensive input. The buildings and production methods guide covers the input chains. Second, paper. Merchant quarters, trade offices, and the colleges that raise literacy all consume paper, and a Portugal that overbuilds trade infrastructure runs straight into a paper shortage that silently caps everything. When paper starves, build paper workshops and the lumber and wool inputs that feed them, in that order.
Where this all leads is the number that makes Portugal worth playing. Crown power multiplies trade value — your trade income is roughly your market footprint times your crown power — and trade capacity is the lever that keeps growing when tax base stops. A fully built tall Portugal reaches four-figure monthly income with more than half of it from trade, out-earning countries with several times its tax base. Castile ends the era twice as rich on paper and four times as populous, and Portugal still pulls ahead, because trade income does not scale with land. Every marketplace, every patrol, every point of crown power is a down payment on that crossover. The trade and markets guide explains capacity, offices, and market access in full.
Estates, Legitimacy, and the Black Death
Estates are a thermostat, not a resource to be mined. Set them correctly and they disappear from your attention for decades; push them for short-term gain and they burn your campaign down. The operating range is narrow and knowable. Keep every estate above fifty percent satisfaction and you will barely notice them. Let them slide below twenty-five and they pay less tax and send fewer men to your levies. The nobility is the dangerous one: below roughly forty percent, noble rebellions start, and noble rebellions are the kind that kill small countries. Burgers and peasants can be squeezed harder because their uprisings are weak, but fifty percent is the floor that lets you forget about the whole system. Your estate panel lists exactly what each satisfaction tier changes — read it once and you will never need a reference.
The clergy is the special case that shapes Portuguese research. As a Catholic country you cannot tax the clergy at all, and you should not want to: clergy satisfaction is the one happiness number that scales your scientific research, which in turn gates the institutions that open the Atlantic. A Portugal with content clergy researches; a Portugal that neglects them falls behind on the tech ladder that is its entire reason for existing.
The privilege economy runs on legitimacy, which is why arriving at 100 legitimacy early matters so much. Each privilege costs roughly five legitimacy, and the sound pattern is to grant privileges that let you tax an estate harder — the privilege pays for itself while pushing the values you want. Revoking privileges is the opposite deal: the stability cost scales with how strong the estate has become, so a revoke that costs a burger estate a trifle can cost the nobility a campaign-wrecking amount. The revoke tooltip shows the exact stability price before you commit; pay attention to it, and grant cautiously so you rarely revoke. Changing laws directly carries the same kind of stability cost, so route law changes through parliament whenever you can.
Parliament itself unlocks within the first couple of years and wants to convene on a rhythm of roughly five years; stall much longer and the estates grow restive. Convene in the capital when you want centralization — which raises crown power, which raises trade income, which is the Portuguese loop in miniature — and spend your accumulated support on preparation-for-war agendas, which grant a multi-year casus belli on a neighbor, and on discounted roads, which are control you buy at a discount. The estates and crown power guide covers the assembly in full.
Two small moves punch well above their weight for a pop-starved nation. First, the dynastic one: when your heir marries, a young spouse with strong stats becomes a member of your dynasty, and while she is still a princess — the heir's wife, not yet queen — you can grant her cabinet rights and install her as an advisor, which costs legitimacy but typically beats any advisor you could hire. Once she becomes queen, Catholic rules bar the cabinet, but she strengthens crown authority instead. Marry well and the dynasty staffs itself. Second, the diplomatic one: the Invite Settler action spends favor with an ally to import a few hundred pops over two years. It sounds trivial. Under the every-pop-matters rule it is one of the best population tools Portugal has, and it costs nothing but the favor you were already building with Castile.
Then there is the plague. The Black Death arrives early in a 1337 campaign, and the correct response is deliberately boring: move the court into hiding, segregate the infected, pick scapegoats, and wait. Do not over-invest in countermeasures, because the plague leaves and then returns, and do not push a construction program through it — there are no workers anyway, and anything you queue stalls. Light infrastructure around Lisboa is the most you should attempt. The population loss is about what you would expect, and the tax base takes the better part of fifteen years to fully recover, which is another reason the first decades are about patience and not about speed. A Portugal that treats the plague as a minor weather event, rather than a crisis to be heroically managed, comes out of it with its plans intact.
Your First War — If You Want One
Portugal's first war is optional, and internalizing that changes how you play the whole era. The sea does not threaten you, Castile is your ally, and no one is coming. War is a purchase, made for what it pays and what it teaches, and Portugal gets to comparison-shop. Three paths are sound, and the honest difference between them is not strength but appetite.
| Path | Right when | What it pays | What it risks |
|---|---|---|---|
| Granada first | You want a safe, instructive war with a strong ally at your back | A whole peninsula coast, an assimilation sandbox, stolen maps, war money | Little — the classic beginner war |
| Morocco first | You want aggression and can field a real army | African footholds, more maps, a weakened southern rival | Malaria, stronger troops, a war that can drag Castile's patience |
| Long peace | You want pure economy and find wars inefficient | Decades of compounding income, zero army cost | Falling behind on the maps and claims wars would have handed you |
The Granada path is the one most Portuguese campaigns should take, and the recipe is specific. Wait for a moment when Morocco is weakened — it wars with Tlemcen regularly and often loses its army doing it — so you fight Granada without the full Maghreb landing on you. Take the casus belli through parliament's preparation-for-war agenda rather than paying full price for claims. When you declare, call Castile in mainly for military access through its territory, then race: split your army to occupy every province at speed, be first on Granada's capital, and use naval levies to ferry troops where the coast allows. The war goal matters more than players expect — never take Show Superiority, which generates almost no war score even for large countries fighting small ones; always choose a siege-type goal, and treat the parliament war goal's bonus as modest rather than magical. At the table, take all of Granada plus money, and steal whatever maps the peace offers — Central African maps from Granada and Sahara maps from Morocco are exploration you acquire for free. From Morocco itself, take reparations and maps but no African territory yet; grabbing land there early endangers the Castile alliance, and the alliance is worth more than a province.
What you do with Granada afterward matters more than the war. Hold it directly. Releasing it as a vassal is the intuitive EU4 move and the wrong one here: vassals are no longer the profit center they used to be — recent balance passes turned them into a genuine expense — and worse, rebellions in vassal-held Granada provinces can spawn new minor states or hand territory straight to Morocco, and a released Granada can slip into full independence. Integrate directly, demolish the captured fortresses so that the inevitable rebellions have no fort to hide behind — rebels without a fortress die quickly — and start the cultural work immediately, because assimilation takes decades and every lost year compounds. Accept Andalusian culture, which is affordable; leave Moroccan hostile, because accepting a hostile culture can eat your entire culture pool and take a century anyway. Assimilation speed scales with control — the tooltip says so outright — so pair a control-raising advisor with an assimilation advisor and let decades do their work.
The Morocco path deserves respect rather than recommendation. Moroccan troops are stronger man for man than Iberian ones — cavalry-heavy levies and professionals that win an even fight — though the AI frequently leaves its army nowhere relevant, which makes the wars easier in practice than the numbers suggest. If you go this way, push your social values toward serfdom first, because a Morocco that fields its full levy can be genuinely dangerous, and take Fez early, because it is the backbone of the country. Two operational warnings decide African wars. Malaria attrits your army in Morocco and worse further south, and the counter is patience: retreat, let the disease burn itself out, reinforce from home — troops cannot reinforce in occupied territory, only on your own soil — and then fight defensive battles. And if you invade deeper Africa by sea, bring modern supply carts and a fishing fleet on food duty; the early carts carry almost nothing, and an unsupplied army dies before it fights. The warfare guide covers levies, sieges, and supply in full, but three era-specific habits carry the early game: mass your levies in one province rather than raising them piecemeal, prefer cavalry over cannons until gunpowder matures, and never storm a fort immediately — wait for the morale bar to refill between assaults or you will bleed thousands for nothing.
The long-peace path is legitimate and underrated. Disband the army entirely, redirect the maintenance into RGOs and buildings, and let a century of income do what wars would have done slowly and expensively. Its cost is strategic rather than financial: the maps, claims, and weakened rivals that wars hand you arrive later or not at all, and spy networks only partially compensate — though running a network on Morocco to steal maps is cheap insurance either way. One mechanic to file away regardless of path: diplomatic vassalization essentially never works in EU5, so do not build plans around it. Subjugation happens by war and annexation, or not at all.
The Exploration Ladder: Reaching the New World on Time
Exploration is the fantasy that brings players to Portugal, and the single most common way to ruin a Portuguese campaign is to indulge it early. Exploration is a luxury purchase with a technology gate bolted onto it. The purchase test is arithmetic: open an exploration mission's tooltip, read its monthly cost, and compare it against your net income. Until a mission is a fifth of your net income or less — realistically fifty to a hundred ducats a month of surplus — you cannot afford it, and nobody is stealing your islands while you build the economy that makes them cheap. The Atlantic has been waiting for centuries. It can wait for your budget.
The gate is the part that surprises people. Brazil and the Caribbean are physically unreachable until three things align: the Age of Discovery must be active, the New World institution must be embraced, and the open-sea exploration advance must be researched. No amount of ducats substitutes for any of the three. Institutions spread through trade and over time, and once enough locations know one you can embrace it with stability and money — the wider it has spread, the cheaper the embrace. New World institution spawn odds rise with literacy, so the libraries you build for research double as preparation for the Atlantic; also confirm that historical institution spawning is enabled in your game rules, because a forgotten setting silently delays the whole ladder. Your era panel shows the exact trigger conditions and bonuses for your campaign, including the Age of Discovery's colonial maintenance reduction — read it there rather than trusting any fixed number. When the age arrives, take the diplomatic focus without hesitation: roughly half of its tree feeds colonization directly, with quest lines for the New World, fortune seekers, colonial migration, colonial range, and a large boost to overseas trade range that pays for itself for the rest of the campaign. And finish the banking techs on the way — Portugal's exploration identity runs on them, and skipping banking is the classic regret.
The ladder itself is a sequence of stepping stones, and each stone exists to extend the reach of the next. Explore the sea zones off West Africa, found Madeira first — but not at campaign start, when it would hemorrhage money you do not have — then the Azores and the Canaries, then Cape Verde, and finally the Caribbean. The exact order matters less than the principle: every island is a percentage of its trade capacity and a base that pushes your colonial range further, and Bermuda-class waypoints exist purely to make the next jump possible. The pipeline for each stone is the same: explore a sea zone, send an expedition, found the location, issue a colonial charter naming the home location that supplies settlers, send pops, build a settlement to grow them, and promote the settlement to a town once it reaches roughly five thousand people — again, the location panel shows your campaign's exact threshold. Exploration timers run in years, not months; a West African coast can take around four years to reveal, and Cape Verde-class outliers take longer. Once your income supports it, run two or three expeditions concurrently, because the timers stack and patience compounds. When the discovery of a new world fires, it pays cash, prestige, and research — put the money straight into the printing press.
Now the constraint that defines Portuguese colonization, stated one more time because it is the whole game: every colony is people you no longer have at home. The colonial migration bonuses that make Portugal special are a double edge — they ship settlers faster than you regrow them, and a homeland emptied into three simultaneous colonies stagnates while its rivals grow. Colonize one region until it is self-sustaining, then expand. Never three at once; this is the most consistent regret across serious Portuguese campaigns. Offset the drain wherever you can: the Invite Settler action imports pops from allies, the census action temporarily doubles population growth while it runs, granaries and prosperity raise the baseline, and native enslavement policies staff colonial resource sites without spending Portuguese lives at all. A colony's only purpose is to extract New World resources and sell them in the Old World — Brazilian gold shipped to Lisboa, slaves imported into Brazil — and a colony that staffs its own sites stops billing the homeland.
Structurally, keep your early islands integral. Do not form colonial nations out of Madeira or the Azores; build them as Portugal until maritime presence and control make them productive. For distant possessions the viceroyalty building creates a local source of proximity so that faraway land is not rendered useless by its distance from Lisboa, and colonial nations come into their own later — they always share your culture and religion, they extend your colonization range when they hold far-flung coast, and they share their trade and market access, which is how gold flows home. A location with zero market access has its resource tax reduced to almost nothing, so a tiny micro-market — one upgraded town — can be the difference between a colony that pays and one that bleeds.
Two Iberian specialties finish the picture. The Treaty of Tordesillas lets you stake vast papal claims that bar other Catholic nations from colonizing your zone — take it, and understand its implication: as a signatory, converting away from Catholicism during the Reformation forfeits the claims that protect your empire, and the trade is not worth it. And conquistadors, available to Iberian Catholic nations, take direct personal control of whatever they occupy and can raise local levies to snowball — but only where the local population has been thinned by the Great Pestilence. Against intact civilizations a lone conquistador achieves nothing, and an army shipped overseas cannot resupply from home territory, so a conquest expedition is a one-shot commitment: bring the full army or do not bring one. How the Pestilence falls in your campaign is largely luck, so read the actual population numbers before committing rather than assuming the Americas will be empty.
Mistakes That Sink Portuguese Campaigns
- Colonizing before the economy exists. Early exploration on a thin income is the classic bankruptcy, and the islands are not going anywhere. Exploration becomes legal when it stops being a large fraction of your net income.
- Allying Navarra or Aragon. The one reliable way to make Castile aggressive. Portugal campaigns die to Portuguese diplomacy, not to Castilian ambition.
- Keeping the forts. Eighteen ducats a month buying security you do not need once the Castile alliance exists. Delete them and fund the navy instead.
- Selling cloth against Castile. It out-produces you and floods the shared market. Sell tools, marble, and salt — the goods it must import.
- Running three colonies at once. Migration bonuses empty the homeland faster than it regrows, and a stagnating Portugal funds nothing. One region to self-sufficiency, then the next.
- Taking the Show Superiority war goal. It generates almost no war score, even for large countries fighting small ones. Siege goals, always.
- Releasing Granada as a vassal. Vassal provinces attract rebellions that can spawn new states or defect to Morocco, and vassals are an expense now, not an income. Hold Granada directly and demolish its fortresses.
- Marching into Morocco without respecting malaria. Retreat, let the disease burn out, reinforce on home soil, fight defensive battles. Heroism attrits.
- Letting the nobility slide below forty percent satisfaction. Noble rebellions are the ones that kill small countries. Every other estate forgives; this one does not.
- Spending the whole legitimacy pool on privileges at once. Privileges cost legitimacy and the upkeep of maxed legitimacy is cheaper than the bribes of low legitimacy. Drip-feed them.
- Forgetting banking. Portugal's entire exploration identity runs on the banking techs, and skipping them delays the Atlantic by years. It is the most common mid-game regret.
FAQ
Is Portugal a good beginner country in EU5?
It is a good maritime school but not the safest first pick. Portugal teaches trade, control, spending discipline, and neighbor management in a compact package, and its small size keeps the map readable — but it starts in the red next to a much larger power, and its population is thin enough that mistakes compound. If you specifically want navy and colonies, Portugal is excellent; if you want the gentlest possible introduction, start with Castile and play Portugal second.
Should Portugal fight Castile early?
No, and realistically not ever within the first fifty years. Castile is larger in every measurable way, and the friendship is the cheapest security guarantee in the game. Improve relations on day one, take the alliance, and point your rivalries at Granada, Tlemcen, and Tunis. The single trigger to avoid is allying Navarra or Aragon — that, not any war, is what turns Castile hostile.
When can Portugal actually reach Brazil and the Caribbean?
Only when three gates open together: the Age of Discovery is active, the New World institution is embraced, and open-sea exploration is researched. Before then the Americas are physically unreachable, no matter your treasury. Libraries raise the odds of the institution spawning near you, the diplomatic age focus feeds the colonial tech tree, and the island chain — Madeira, the Azores, the Canaries, Cape Verde — extends your range one stepping stone at a time until the crossing becomes possible.
What should Portugal build first?
Nothing, at first — delete first. Remove every fort except the capital's, cut army maintenance, set minting to break even. Then upgrade resource-gathering operations, because surplus raw goods sell even without factories, and build marketplaces in the capital before anywhere else. The first real production should be tools from Portuguese iron, sold to Castile — not cloth, which Castile floods the market with.
Why is Portugal losing money at the start?
Almost always forts and army maintenance on a tiny income, made worse by low legitimacy. Fortifications alone can consume the better part of twenty ducats a month, and a Portugal below fifty legitimacy leaks money from several directions at once. Delete the forts, push legitimacy toward 100 with an advisor, mint only to break even, and the starting deficit resolves — campaigns that reach full legitimacy often watch their financial problems simply disappear.
Should Portugal release vassals or hold conquered land directly?
Hold Granada directly and be cautious with vassals elsewhere. Subjects are no longer the profit center they once were — treat them as a holding pattern and an expense, not an income — and vassal-held Granada provinces are rebellion magnets that can defect to Morocco or spin off as new states. Faraway foreign territory is the legitimate use for colonial subjects later — they share your culture and religion and extend your colonial range — but the peninsula itself should be Portuguese.
How do I know if a balance patch changed this build order?
Stop memorizing numbers and read the game. The estate panel lists what each satisfaction tier does, the era panel shows the current age bonuses and trigger conditions, the location panel shows upgrade thresholds, and every mission and privilege tooltip shows its exact cost before you commit. The numbers in this guide are the values these systems have run at; the structure — fix the budget, befriend Castile, sell what Castile lacks, colonize one stone at a time — has survived every balance pass so far, because it follows from how the systems work rather than from what they currently cost. The EU5 beginner guide sequences the universal opening this plan builds on.
Next Reads
- EU5 Beginner Guide: First 50 Years — the universal opening checklist for any nation.
- Castile First 50 Years — your ally's campaign, and the best contrast for understanding Portugal's route.
- Best Starter Nations in EU5 — where Portugal ranks among first campaigns, and why.
- EU5 Economy Guide — the tax-base pipeline from building to treasury, in full.
- EU5 Control Guide — proximity, roads, rivers, and the maritime presence that lets a coastal nation own its shore.
- EU5 Estates and Crown Power Guide — satisfaction thresholds, privileges, and parliament.
- EU5 Trade and Markets Guide — trade capacity, offices, and market access: the engine Portugal actually runs on.
- EU5 Warfare Guide — levies, sieges, supply, and early-era combat.
- EU5 Diplomacy Guide — alliances, antagonism, coalitions, and personal unions.
- EU5 Bankruptcy, Loans, and Minting Guide — when borrowing is correct and when it ends campaigns.
- EU5 Buildings and Production Methods Guide — input chains, profitability, and the paper problem.