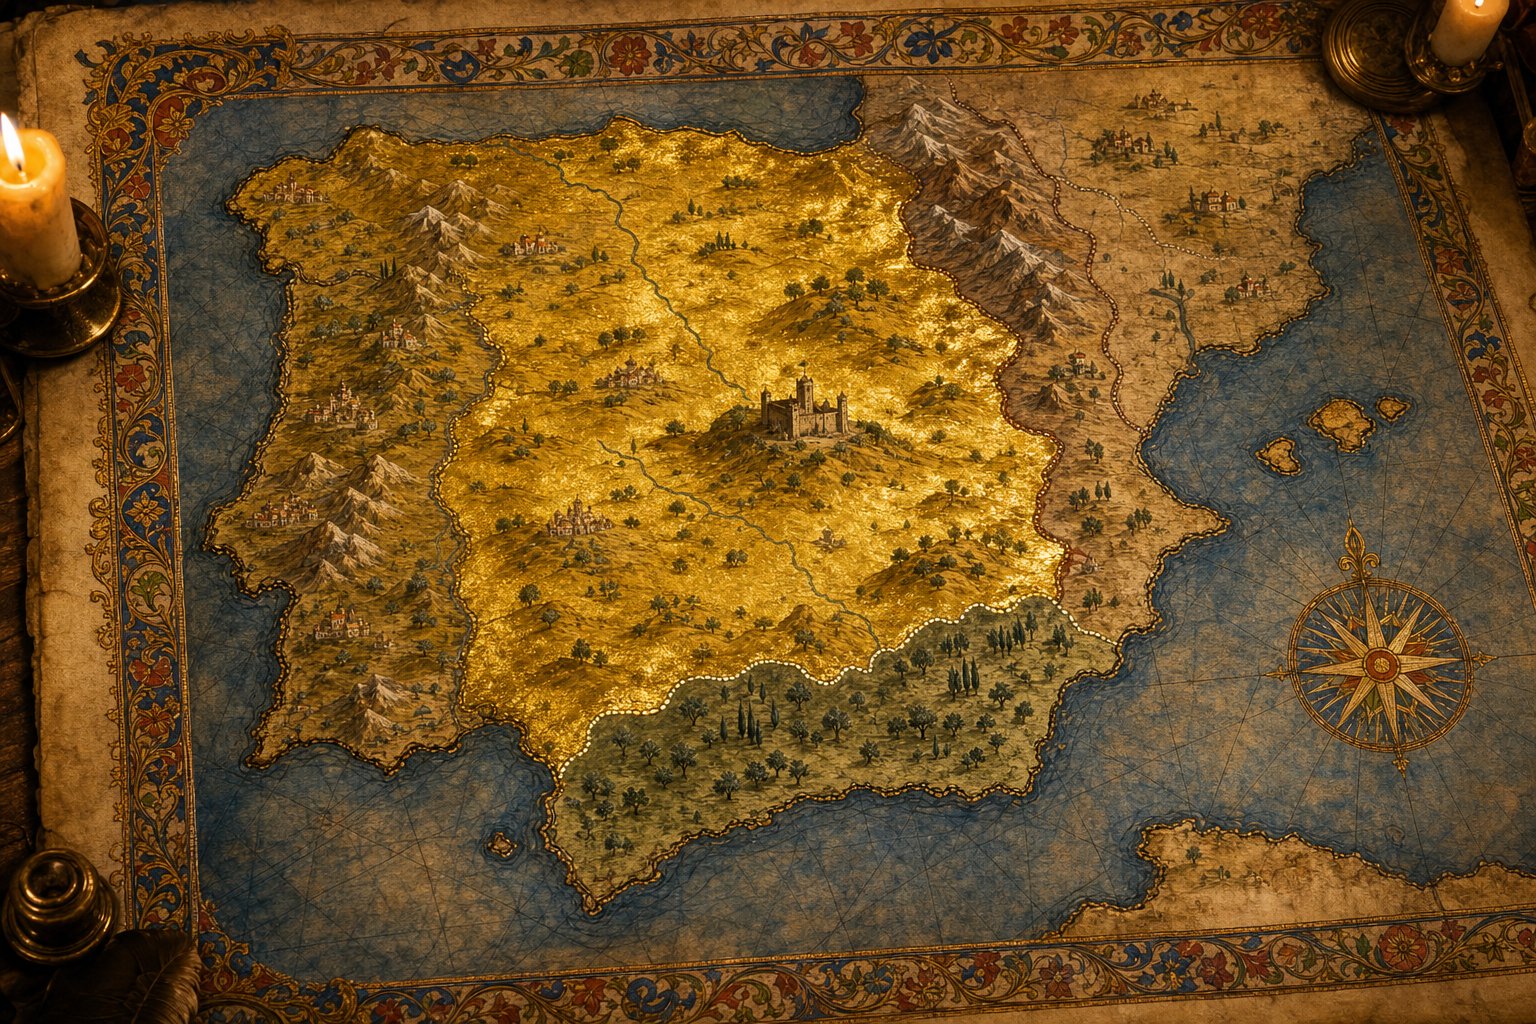
Ask an experienced player what Castile is and you will hear two different answers. The brochure version is the Reconquista: holy wars, five neighbors to eat, the road to Spain and the New World. The working version is a country that compounds. Castile is the nation serious players boot up to stress-test a balance patch, because its strength does not depend on any one trick surviving rebalance — it comes from population, control, and an economy that snowballs if you leave it alone. The Reconquista happens either way. The only question is whether you fund it from a booming treasury or from a country you hollowed out to field the armies.
This page gives you the mental model first, then the concrete opening. If you only remember one thing, remember the engine in the next section — every specific tip below is one turn of it, and the numbers will move under you from patch to patch while the engine does not. If this is your very first EU5 campaign, run the EU5 beginner guide alongside this one; if you are still choosing a country, the starter nations ranking puts Castile in context.
The Engine: Control, Prosperity, Population
Forget build orders for a moment. Castile runs on one loop, and once you can see it you will never need to memorize a sequence again:
Control converts land into wealth. Prosperity converts wealth into population. Population converts into development, and development converts back into wealth — faster, because development is a hidden income stat.
Start with control, because it is the master multiplier. Control decides how much of a location's potential you actually collect — base tax, manpower, sailors, crown authority, all of it. A location at twenty percent control is a location you own on the map and lose eighty percent of in the treasury. Control spreads from your capital and decays with effective distance: mountains strangle it, flat ground spreads it, rivers carry it like highways, roads extend it, and governors project it. Castile's heartland is a flat central plain crossed by the Douro, the Tagus, and the Guadalquivir, which means control is cheap here if you build along the water. This is the geographic fact about Castile that matters more than any other.
Prosperity is the gear most players never look at, and it is doing more than any of your buildings. Prosperity drives population growth directly and adds a flat trickle of development every month on top. Population, in turn, is the resource that underpins everything else — levies, taxes, urbanization, long-term scale — and it snowballs: more people develop more land, and developed land feeds and employs more people. Castile will never out-populate France by raw geography. The only way to win that race is to enter every crisis taller and lose less in each one. That sentence is the entire strategy, and the plague section below is where it gets tested.
Here is the deliberate weakness built into the start. Castilian core locations begin far less developed than the cores of France, England, or Italy — open any location panel and read the gap yourself; it is the single most important number on your start screen. Development matters because it is a hidden income stat: developed pops consume more goods, and consumption is what makes production profitable. A silver mine makes money; a developed region makes a market. Castile's first fifty years are, mechanically, the project of grinding that development number up across an entire kingdom — and every tool the game gives you, from control to prosperity to urbanization to cabinet actions, is a development tool whether its tooltip says so or not.
The one thing the engine does not do is wait. The Black Death reaches Iberia within roughly a decade or two of the start, and it is not a disaster that happens to your campaign — it is the event your campaign is graded on. Everything you build before it is amplified; everything you postpone until after it is rebuilt at half strength. Read the rest of this article through that lens: the opening decade is a race, the economy is the prize, and the wars are what you fit in between. The control guide explains exactly how proximity, terrain, roads, and governors combine.
Before You Unpause: Reading the Castilian Start
The durable skill in EU5 is not knowing a build order — balance changes move the numbers every update. It is reading a start screen the way a veteran does, so you can reconstruct the plan yourself in any version of the game. Before you unpause Castile, spend five minutes on these checks. They tell you everything a tier list would tell you, and they do not go stale.
| What to read | Where in-game | What Castile shows you, and what to do about it |
|---|---|---|
| Crown power | Government panel | It starts low — and crown power is the share of your trade income you actually keep, with penalties below roughly a quarter. The early levers are free: the king commanding the army, a royal family member commanding the fleet, a royal court building. Take all three. |
| Control and resources | Control, terrain, and resource map modes (hotkey them) | Shows which locations hold silver, iron, copper, tin, and mercury. Those are your bailiff sites; learn them before you build anything. |
| The two markets | Economy panel | Castile starts split across two markets, and a resource can sit inside your borders yet belong to the other one. Automate both immediately — this is a lesson in how goods flow, not a minigame you win by hand. |
| Estate satisfaction | Estates panel | The clergy cannot be taxed at all, but its satisfaction scales your research speed — at maximum, research comes a quarter faster, forever. The nobility below roughly two-fifths starts rebellions. Plan privileges before unpause, not during the first crisis. |
| Forts | Military panel; provincial capitals wear a silver outline | Keep a fort only in each provincial capital — hold the capital and the rest of the province snaps back to you when raided. Delete every other fort; the maintenance is pure loss. |
| Rivals and spies | Diplomacy screen | Kingdom rank allows three rivals: set Aragon, Granada, and Morocco, your first three targets. Open a spy network on Aragon or Navarre immediately; claims take years to fabricate. |
| The plague clock | Nothing on screen yet — that is the point | Hospitals, communalism, and urbanization sit on a timer you cannot see. Everything else in the opening can be delayed; those three cannot. |
Two of those rows deserve extra emphasis because beginners systematically misread them.
The first is crown power, because it works silently. Crown power is literally the share of your trade value you collect: at a fifth, four-fifths of your trade income is simply not yours. New players see a healthy trade number and a thin treasury and blame the market. The market is fine. The crown is weak. Every crown-power lever in the early game is cheap — a commander assignment here, a court building there — and pulling them all is the difference between an economy that funds wars and one that begs for them.
The second is the clergy. As a Catholic power you cannot tax the clergy at all, which makes it look like the useless estate. It is the opposite: clergy satisfaction is the one happiness number that scales something irreplaceable, your research speed. Push the clergy to full satisfaction early — the privileges that do it are cheap — and you will never feel tech progress as a bottleneck for the rest of the campaign. The estates and crown power guide covers the satisfaction thresholds and privilege costs in full.
The Opening Decade: Build the Layers, Not the Map
The first decade is internal, and that is not a consolation prize. You are not wasting time by building the base — you are making every later war cheaper and every later province actually worth holding. A veteran Castile player spends the opening years doing almost nothing on the map, and then spends the next forty doing whatever they want. The sequence below is the engine turned by hand.
Spend day one on the things that are free. Put the king in command of the standing army and a royal family member in command of the fleet — each command assignment is a large crown-power bonus that costs nothing and lasts until that character dies. Set trade to automatic in both markets. Max out court and stability spending, and cut army maintenance and diplomacy to the floor: you have no subjects and no wars, so those sliders are pure waste. Place your two governor slots, one on Toledo and one on the southern core around Córdoba or Sevilla; between them, with the rivers doing the carrying, they cover most of the kingdom. Ignore Castile's unique lieutenancy building — it looks patriotic and is a trap, because it projects less control than a governor, and control is the whole game. Start a spy network. Then, and only then, look at the build queue.
Order the estates so each one funds the next. Grant privileges in an order where each purchase makes the next one cheaper or safer. Push the clergy to full satisfaction first, because the research bonus compounds from that moment on. For the burghers, the sequence matters in one specific place: the privilege that makes buildings cheaper must go in before you build your first bailiffs, because bailiffs are the most important building in the campaign and you will never get that money back. After that, take the privileges that grow trade capacity, tax efficiency, and permanent development. For the nobility, buy calm: a few satisfaction-givers early prevent a rebellion you cannot yet afford, and Castile's unique noble privilege that adds levy size and combat efficiency while settling the nobles down is one of the best deals in the game. Two more signature privileges are worth knowing by name — the Fuero Viejo de Castilla, which trickles legitimacy every month, and Caballeros Villanos, the commoner privilege that speeds population promotion. Take both; they are the quiet compounders.
Pick one peasant axis and commit. This is the decision new players agonize over, and the agony is the mistake. Serfdom and free subjects produce nearly identical income — the real difference is military: a free-subjects realm can field up to a quarter fewer levies. Serfdom is the safer default for a first campaign: more soldiers, more raw-materials output, and a satisfied nobility into the bargain. But the wealth trick is not which one you pick — it is picking fast and driving it hard, because the bonuses scale with commitment. A country that sits in the middle of the axis for thirty years gets nothing; a country that maxes either end gets an economy.
Build in layers, not in lines. The construction queue is where beginners lose the decade, and they lose it the same way: they find one profitable building and spam it, or they pave the kingdom with roads while the real buildings stay unbuilt. The opening queue is a layer cake, built in alternating passes. Marketplaces first, because they are close to pure profit and feed everything downstream. Then urban locations, bailiffs, and roads in rotation — with bailiffs taking precedence over roads, because a bailiff is a permanent block of maximum control on your most valuable locations, and a road is only the means to reach them. Flood lumber and masonry ahead of demand: a market surplus of inputs makes every building you construct afterward cheaper, which is how you afford the second and third layers. Build libraries and scriptoriums in every serious location before the plague, because promotion speed is weak and books are what make it move. Throw a bridge across any location that has both a river and a road; it is one of the cheapest proximity investments in the game. Build the layers of your society — do not spam roads every five seconds.
Embrace institutions the moment they appear. Each embraced institution is a permanent research bonus, and the advances that unlock extra cabinet seats, literacy, and cheaper mercenaries are worth more than any early war. When the first age choice arrives, commit to the administrative track — the middle ground funds nothing, and an economy run is won in the ages.
Watch for the development event — and earn it. Once per country, the game can grant a massive, decade-long development boost to your capital. The trigger conditions are visible: a ruler with an architectural-vision trait and a treasury holding many times your annual income. If your starting ruler has the trait, hoard deliberately and keep building toward it; if he does not, forget the event exists and spend normally. When it fires, put it on the capital, not on your shiniest city — the capital region has the population to convert development into consumption, and consumption is the hidden income engine. A development event on a small city is a souvenir; on the capital it reshapes the campaign. The buildings and production methods guide explains what each of these buildings actually does to your market.
The Economy: Silver, Rivers, and the Development Grind
Castile's economy has a reputation for being a wool-and-silver autopilot, and the reputation is half right. The silver is real — your two big silver mines, run at full capacity and full control, are the backbone of the treasury for the entire early game. But "the mines make money" hides the mechanism, and the mechanism is the whole section.
Income comes from valuable resources at full control, not from market fiddling. Markets move goods; they do not create wealth. The loop that creates it, on a mine, looks like this: build a bailiff, which adds a large flat block of maximum control to the location; connect it with a road; put a cabinet member on raising control until the location hits its cap; then migrate workers in until employment is full; and only then expand the resource itself. Keep valuable rural resources — silver, iron, copper, tin, mercury, alum — rural forever. Urbanizing a location destroys roughly half of its rural buildings, so the moment you town a silver location you have chosen to be poorer. Match your bailiff count to your urban-location count and keep building both; that ratio is a decent heartbeat monitor for the whole economy.
Rivers make regions; proximity makes money. A resource only earns if its output reaches a market, and output travels by proximity, which rides rivers like highways. This is why silver is a trap for new players: expensive to expand, poorly spread, and rarely on the water, so its proximity withers. Wool, horses, and cotton on river tiles out-earn silver per ducat invested. When you develop a distant region and its output still does not reach you — the economy panel shows the market-access penalty plainly — found a market there, in a town near the resources, rather than fighting the distance with roads from the capital. And expect an early trade deficit; it is normal, and it self-corrects within a few years of the economy maturing.
Make development the cabinet's day job. Set your cabinet members' default stance to increasing development and leave it there; the trickle is small per month and enormous per decade. The administrative system you choose matters here — Castile's unique division-style reform, the Merindad, grants flat monthly development and better proximity efficiency, and it is the difference between catching up on France and watching France pull away. In parliament, the irrigation legislation is among the strongest laws in the game: monthly prosperity gains and cheaper farm expansion, for the price of keeping approval above half. Prosperity is the gear that turns population into development without spending a thing.
Move the capital once, deliberately, to Toledo. Valladolid is the correct early capital — more development, more farmland — but Toledo is the correct long-term one: central, sitting on iron, and projecting control south and west across the peninsula you are unifying. The move creates a new market and is priced against your income, so do it on a succession, when it is cheap, rather than mid-reign. Then build a governor in the old capital: a governor placed where the capital used to be holds the northern silver mines at maximum control, which the move would otherwise cost you. This little geometry trick is worth more than most wars.
Two small money habits round it out. When gold runs short — and it will, because governors and mints eat it — do not wait for the AI: open the market and create a manual import order for gold, then switch your coinage law once your own silver and copper can mint the difference. And remember the estates are a credit line: an emergency grant from the burghers costs satisfaction but returns real money, and favors with wealthy nations convert to cash. Use both sparingly; they are for the plague and the wars, not for bridging a lazy budget. The economy guide unpacks the full tax-base pipeline, and the trade and markets guide covers how goods actually reach your treasury.
| Location profile | Read on the map | Decision |
|---|---|---|
| Valuable resource (silver, iron, copper, tin, mercury) | Resource map mode; control high | Keep it rural forever: bailiff, road, push control to the cap, migrate workers, then expand. |
| High-population farmland | Locations sorted by population | Urbanize it before the plague — a town retains its people, a village does not. |
| River crossing with a road | Terrain map mode | Bridge it. The cheapest proximity in the game. |
| Distant region with a market-access penalty | Economy panel | Found a market in a local town, or hand the region to a subject. |
| Anywhere with low control | Control map mode | Build nothing. Raise control first — governor, road, cabinet — and come back. |
The Black Death Is Your First Exam
Everything above is preparation for one event. The Black Death reaches Iberia early in the campaign, and it is the single largest population event most countries will ever see. Handled badly, it sets your economy back a generation and hands the population race to France. Handled well, it is the moment Castile pulls ahead for good — not by losing less in absolute terms, but by entering the crisis taller and keeping more of what it had.
Before it arrives, urbanize. This is the one countermeasure that matters more than all the others combined: cities get isolated and retain their population, villages simply die. Filter your locations by population, sort descending, and town every serious settlement before the plague lands — including the culturally foreign ones, because ten thousand saved Basques are worth more than any pride. Alongside that: hospitals in the major cities, because the disease resistance they add saves a visible share of each city's people; granaries and food storage, because cheap, abundant food is what the growth modifier runs on; and communalism pushed as far as it will go, because the plague response tools scale with it. Save cash through the whole decade. The plague is expensive, and the countermeasures are not optional.
When it lands, isolate and segregate. Isolating an infected city sharply cuts the plague's bite in that location, and it requires your burghers to be satisfied — yet another reason the burgher satisfaction you maintained was never optional. Segregating the infected grants disease resistance across the whole country and pushes communalism further, which is the synergy the whole opening was built to cash in. Do not panic-spend on pest houses the moment a single location reports sickness: a one-location outbreak can fizzle on its own, and the investment dies with it. Once the plague is established in several locations, spend hard — pest houses concentrated on the big cities, manual incense imports in every market if the treasury can bear it — and keep a stability buffer, because the tail end of the plague is when stability events bite.
After it passes, rebuild on purpose. The population you lost is employment you now have to refill: migrate workers into the hollowed-out locations, build settlements in the worst-hit ones for a direct population push, and fix the price of food, because expensive food makes the growth modifier negative and quietly strangles the recovery. Develop your best food-producing resources and build the peasant food buildings; solving cheap food once benefits the rest of the playthrough. Then resume the engine — one town per province at minimum, each new town founded with a church, a library, and a granary — and understand what just happened in the race: a prepared Castile loses about as many people to the plague as France does, and still comes out hundreds of thousands of souls ahead, because it started taller and saved more. That is the engine, proven under fire.
| Timing | Action | Why it works |
|---|---|---|
| Years 1–10 | Urbanize high-population locations; hospitals in major cities; granaries; push communalism; save cash | Cities retain population; resistance and communalism scale every later countermeasure. |
| First outbreak | Isolate infected cities; segregate; do not overspend on one location | Burgher satisfaction unlocks isolation; segregation grants countrywide resistance; single outbreaks can fizzle. |
| Plague established | Pest houses in the big cities; manual incense imports; stability buffer | Concentrated spending saves the populations that matter; stability events bite at the tail. |
| Recovery | Settlements, migration, cheap food, new towns with church-library-granary | Employment must be refilled; negative food cost is the silent recovery-killer. |
War as a Side Dish: The Order of Iberia
Now the part the brochure promised. Iberia unifies in Castile's first fifty years in nearly every campaign — the question is whether the wars fund the engine or eat it. The principle is simple: war is a side dish, and every conquest is held as a subject, not a province, until the engine can afford to digest it. Direct integration takes decades per province and drags your realm toward decentralization; a subject holds the land for almost nothing, buffers your border, and — released in the right religion and culture — its own two cabinet advisors will integrate and convert it for you while you build.
Diplomacy before declarations. The coalition threshold is a fixed antagonism number you can read in the diplomacy panel, and France is the only neighbor that can realistically cross it against you. So manage France the way you manage weather: improve relations from day one and keep improving them for decades; pay the diplomatic spending slider in full, because it buys diplomatic reputation and reputation slows antagonism gain; and put a cabinet member on diplomatic work. Rivaling France's rivals slows its antagonism further. Done patiently, this holds France far below coalition range through your entire unification — and it doubles as curia insurance, because as a Catholic power, excommunication lets the world attack you, and French influence in the curia is the lever that keeps you in good standing. The diplomacy guide covers the full antagonism and coalition math.
The order of operations follows one rule — take what is time-limited first, and leave what is patient for last:
| Neighbor | When | Why this order | What to do with the land |
|---|---|---|---|
| Navarre | First, before it gathers alliances | A small, clean war that teaches your army the battle-and-siege loop. | Annex outright, or feed it to a subject. |
| Granada | Second, once your navy can block the strait | The safe Reconquista sandbox: beatable armies, forgiving terrain, and a religious minority that is the perfect place to learn assimilation at low stakes. | Vassalize, not annex. Let the subject convert and integrate; annex a decade later. |
| Morocco | Not early — blockade only | Its tribal levies are the strongest early army in the game and will wipe a stack twice their size. Park the fleet on hunt-navies across the strait; Morocco has no real navy to answer it. | If you take a foothold, fortify it and hand it to a subject; subjects adopt your religion and convert the land for you. |
| Aragon | Before France dismembers it, and before the plague | The time-limited prize: left alone, Aragon is eaten by its neighbors, and its cities die in the plague because the AI will not isolate them. | Take the Iberian core; leave the trans-Pyrenean provinces alone — they drag you into Empire politics. Release the rest as two or three large subjects. |
| Portugal | Last, by dynasty if luck allows, by war otherwise | A marriage into the Portuguese line can unite both crowns without a war; failing that, it is a one-war conquest once you are strong. | Taking the southern provinces by war early shaves decades off any later integration. |
Three rules of conduct cover almost every battle. Keep your armies together — divided stacks are how you lose twenty thousand men to nothing. Never attack into terrain that gives the defender a bonus; fight on your terms, or let the AI attack you on yours. And build toward cavalry-heavy armies: in the early era, army initiative lets a small professional cavalry force fight far above its weight, and the AI never fields a full-strength stack against you. Raise the professional core, keep the levies for sieges, and read the current unit stats in the army designer rather than copying a fixed template from anywhere — including this page. The warfare guide covers supply, sieges, and combat in depth.
Design subjects to be absorbed. Two numbers govern this. First, annexation carries a minimum base cost regardless of the subject's size — a one-location subject takes about as long to absorb as a three-province one, so never release single-province micro-states; three to five provinces per subject is the working size. Second, every subject pushes your realm toward decentralization, so a swarm of tiny vassals is a tax on your crown for the rest of the campaign: fewer, bigger subjects, always. Give the more populated land to fiefdoms, which stay loyal under population, and wait until a subject has finished integrating its provinces before you flip its culture — rushing culture change feeds independence movements that your enemies can join. When you do assimilate, here is the trick nobody tells you: lowering your own attitude toward a culture flips the assimilation modifier from hostile to favorable. It costs nothing and it works. Plan the pivot ahead, too: once the first wave of subjects is absorbed, turn the crown back toward centralization — Castile's unique legal code, the Ordenamiento, bundles estate satisfaction, cabinet efficiency, and centralization in one law, and it is the natural keystone of that pivot.
Common Castile Mistakes
Castile rarely loses dramatically. It loses quietly — a treasury that never fills, a population that never recovers, a neighbor that was someone else's by the time you looked up. These are the mistakes that cause it, and each fix is one turn of the engine.
| Mistake | Why it hurts | The fix |
|---|---|---|
| Opening with a Granada or Morocco war | War before the engine; Moroccan tribal levies wipe early armies outright. | Build the first decade; let the navy blockade Morocco for as long as it wants. |
| Waiting for the Iberian Wedding to take Aragon | France dismembers Aragon first, every time. The event you are waiting for never fires. | Take Aragon's Iberian core yourself — before the plague if you can. |
| Invading North Africa | Tribal levies, long supply lines, and a foothold you cannot hold. | Blockade the strait; fortify any foothold and give it to a subject. |
| Building bailiffs before the cheaper-buildings privilege | You pay full price for the most important building in the campaign, forever. | Grant the burgher efficiency privilege first, then build. |
| Releasing Galicia and other micro-subjects | Small subjects are weak, slow to integrate, and each one drags you toward decentralization. | Hold the land yourself until control reaches it — or release three-province subjects, never one. |
| Leaving towns in AI hands before the plague | The AI will not isolate its cities, and the population you wanted just died. | Conquer the urban locations early; they are worth more alive. |
| Over-investing in silver | Expensive to expand, poorly spread, rarely on a river — proximity starves it. | Diversify into wool, horses, and cotton on river tiles. |
| Colonizing before the economy can afford it | Exploration costs a fixed monthly sum per sea tile — a fortune on a thin income, pocket change on a real one. | Max the tax base first; the New World is not going anywhere before the 1420s. |
| Ignoring legitimacy and stability | Disasters fire, promotion speed halves, estates drift toward revolt. | Keep both near maximum; they are investments, not sliders. |
FAQ
Is Castile good for beginners in EU5?
It is the best all-round first campaign in the game: the largest starting population in Western Europe, a wealthy and nearly self-sufficient economy, an army that forgives mistakes, and content that teaches estates, control, limited war, and eventually colonization in a sane order. If you want something even quieter and land-only, Hungary is the alternative — but Castile is the gentler teacher for most players.
Should Castile attack Granada first?
No. Granada is the second or third war, after an opening decade of internal building, and even then the correct peace deal is vassalization, not annexation. A vassalized Granada converts and integrates itself while you keep building; an annexed one is decades of low-control provinces on your budget. The only war that is genuinely time-sensitive is Aragon, because France will eat it if you do not.
How do I avoid going broke as Castile?
Fix the crown and the control, not the budget. Crown power is the share of your trade you actually keep, and control is the share of each mine you actually collect — most "broke Castile" stories are low numbers on those two stats with a perfectly good economy underneath. Put the king in command of the army, build bailiffs on the silver and iron, push control to the cap, and cut army maintenance and diplomacy to the floor while you are at peace.
When should I move the capital to Toledo?
On a succession, once the center of the kingdom is urbanized. The move is priced against your income and cheaper at a ruler change, and Toledo is the long-term correct capital — central, iron-rich, projecting control across the whole peninsula. Leave a governor in Valladolid when you go: it keeps the northern mines at maximum control, which the move would otherwise cost you.
When should Castile start exploring?
Not before the 1420s. Exploration costs a fixed sum per sea tile per month, which wrecks a thin income and is rounding error on a developed one. Max your tax base, resources, and roads first; nobody is stealing your colonies while you build the economy that makes them cheap. Then explore several sea tiles at once and send colonists from your Castilian-core provinces, so the migrants arrive as Castilians.
What about the "strongest opening" exploit — the noble revolution and culture swap?
You may have seen it: deliberately trigger a noble revolution, lose the country on purpose, culture-swap into a foreign government reform, and reconquer everything under stolen bonuses. It is a real trick and a terrible first campaign. It depends on half a dozen balance-sensitive systems surviving in exactly their current form, it teaches you nothing transferable, and one missed step costs the run. Learn the engine first. The exploit will still be there later — if it survives the next patch, which is more than can be said for most tricks.
Next Reads
- EU5 Beginner Guide: First 50 Years — the full opening checklist for any nation.
- Best Starter Nations in EU5 — how Castile compares with Hungary, Portugal, and the rest.
- Hungary First 50 Years — the quiet land-only alternative.
- Portugal First 50 Years — your neighbor's route, and what you will face if you leave it alone.
- EU5 Economy Guide — the tax-base pipeline, markets, and minting in depth.
- EU5 Control Guide — why rivers, roads, and capitals decide how much of your country you own.
- EU5 Estates and Crown Power Guide — satisfaction thresholds, privileges, and parliament.
- EU5 Trade and Markets Guide — how silver and goods actually reach your treasury.
- EU5 Buildings and Production Methods Guide — before you commit to a big construction plan.
- EU5 Warfare Guide — levies, supply, and sieges before your first war.
- EU5 Diplomacy Guide — antagonism, coalitions, and the French problem.